2.2.2.6 Lab – Using a PL-App Notebook Answers
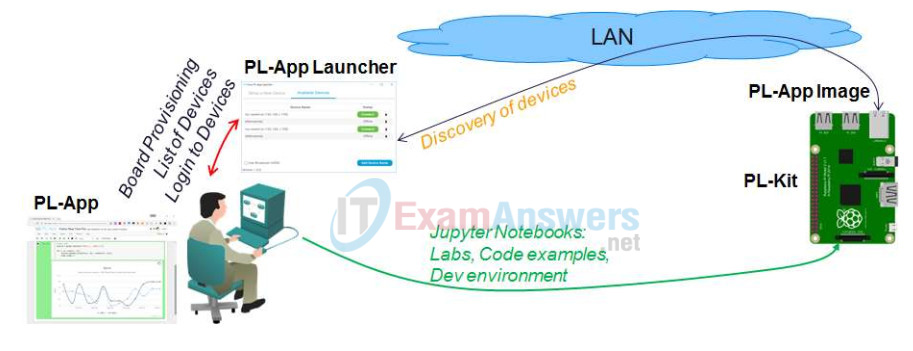
Lab Topology
Objectives
- Access existing PL-App notebooks
- Lean how to interact with PL-App notebooks using keyboard shortcuts
- Create your own PL-App notebook
Background
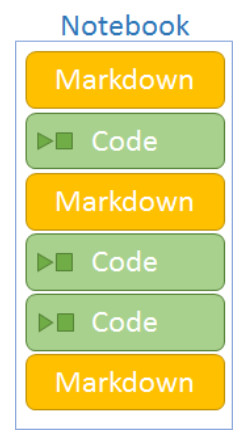
The PL-App notebook concept is based on the Jupyter open source project that provides an interactive web page, where the content is divided into multiple smaller sections called cells. Each cell can contain either Markdown type of code or executable code.
The Markdown cell type is used to write the standard text of the page. Besides formatted text, it can hold multimedia objects like pictures, videos, animations, etc., and it is used to introduce and explain learning objectives, or is used as part of the documentation.
The Code cells are used to write directly executable code in one of the supported programming languages (Python, Bash). The application code can be split into multiple cells, where each cell can be executed one by one, multiple times. The code in these cells can be directly edited and modified, re-executed multiple times, and adapted to specific needs. This enables rapid prototyping concepts, where the development of the final application can be divided into smaller sections, each dealing only with the specific problem, while all the cells are solving the overall problem.
This lab provides a basic guideline to access existing labs – notebooks on the PL-App platform in the Course Materials folder-and to create new notebooks in the myfiles folder.
Required Resources
- Prototyping Lab Kit (PL-Kit)
- Prototyping Lab App (PL-App) Launcher application
- Wired Ethernet or Wi-Fi connection to the local-area network with DHCP
- Raspberry Pi with a power adapter
- Google Chrome or other modern a web browser
Task 1: Use Existing PL-App Notebooks
Step 1: Access a PL-App Device from PL-App Launcher
a. Connect the Raspberry Pi with the PL-App µSD card to the same network as your computer and power on the Raspberry Pi.
b. Start the PL-App Launcher application. You should see the following screen with the Available Devices tab with a list of your PL-App devices. If you cannot see your PL-App device name in the list, click the Add Device Name button to add a new device to discover. Wait until your PL-App device is connected and the green Connect button becomes active.
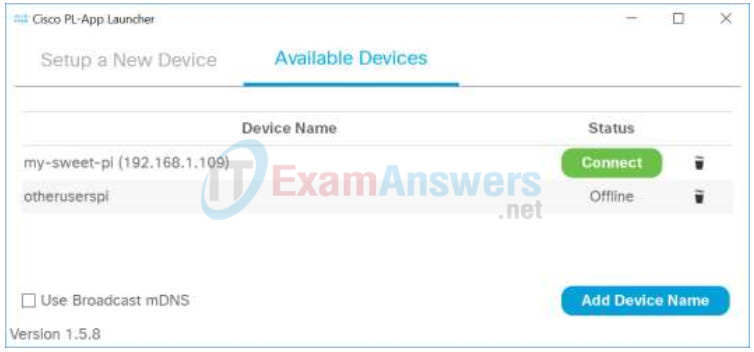
c. Click the Connect button to connect directly to the PL-App web interface running on your Raspberry Pi device.
d. First, log in to the web interface of PL-App. Use the password you specified in PL-App Launcher in the setup process of the µSD card.

e. After a successful login, the PL-App directory browser opens the root directory with the notebooks.
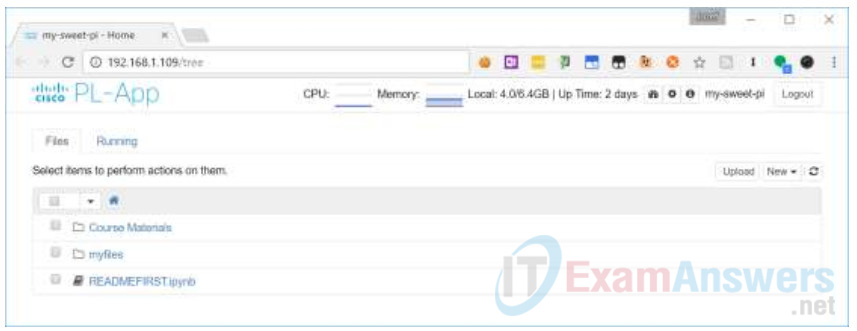
Step 2: Access a PL-App Notebook
a. In the PL-App web interface, navigate to the Course Materials > Tutorials and Demos > Blockly folder and select the Real Time Plot in the Blockly.ipynb notebook to open it in a new browser tab.

b. After the Real Time Plot in Blockly notebook has been opened in a new browser tab, you can start to play with the Visual Programming example in Blockly. Execute the example Blockly cell:
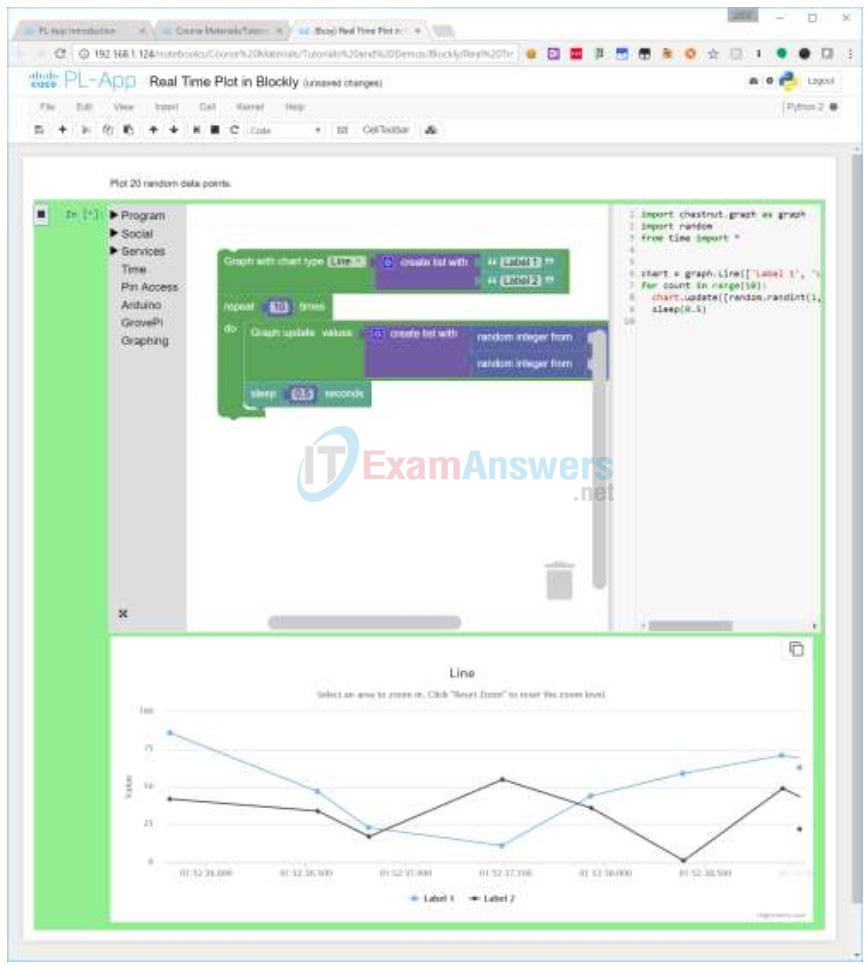
c. Try to modify the Blockly code, change some of the parameters and execute the cell again.
Task 2: Create New PL-App Notebooks
Step 1: Create a new a PL-App Notebook
a. In the PL-App web interface navigate to the myfiles folder and then select from the menu: New > Python 3 to create a new Python 3 based notebook in the current folder:

b. After the new notebook has been opened in a new browser tab, you can start to work with the interactive notebook page. Change the first cell from the default Code type to Markdown:

d. Add some explanatory text to the Markdown cell:

e. To visualize the output , Execute the Markdown cell by using the keyboard shortcut Shift+Enter.
f. Create a new Code cell. In the new Code cell, add a sample Python code and execute the cell either with some of the keyboard shortcuts, or by using the Play button on the left part of the cell:
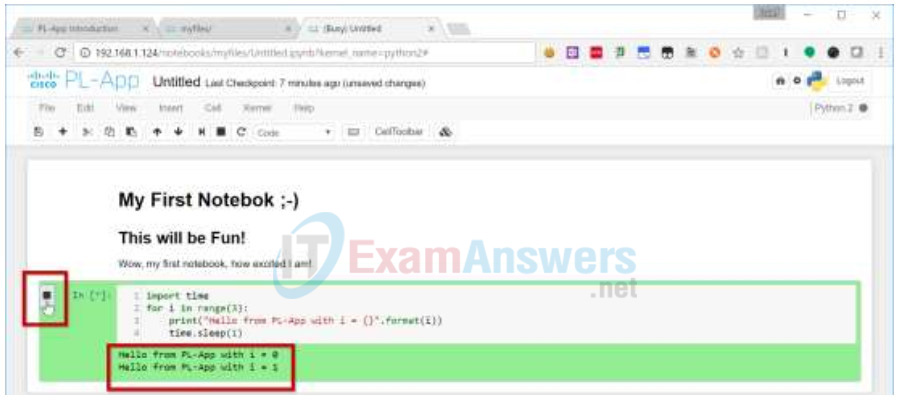
g. Open existing tutorials and sample Notebooks by navigating from PL-App’s homepage to
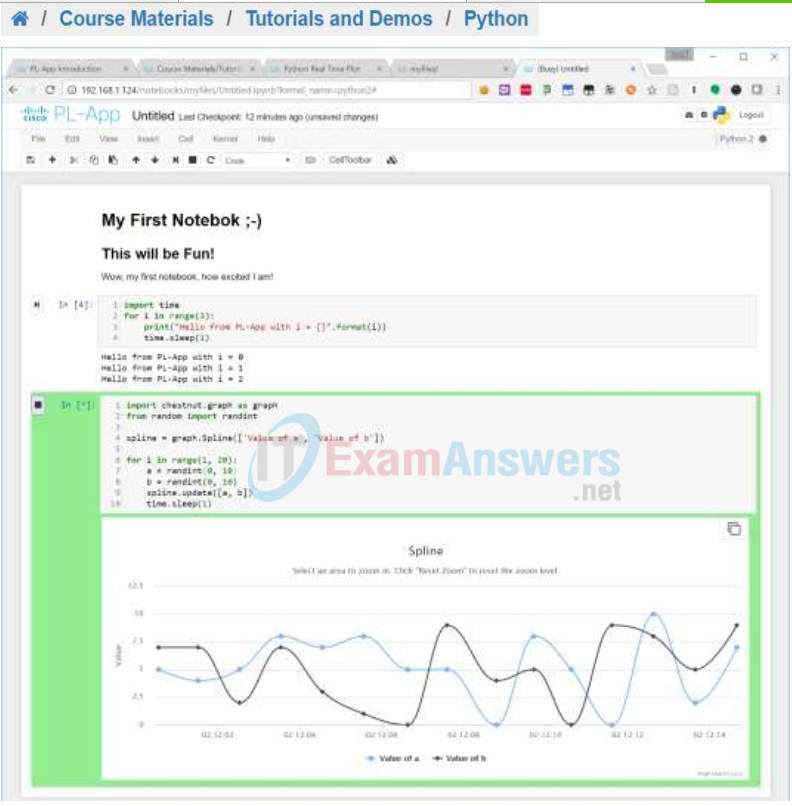
h. To rename your notebook from the default “Untitled”, click the notebook’s name and specify a new name:

i. Close the web browser tabs, remove the power from the Raspberry Pi and remove the µSD card.
j. Insert the µ SD card into your µSD card reader or USB reader and insert it into your computer.
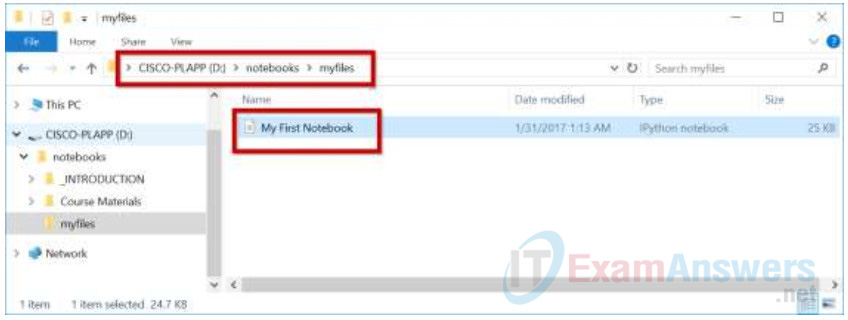
k. Open the File Explorer and enter the µSD card drive. Open the notebooks\myfiles folder to find and backup the My First Notebook.ipynb file to your computer.
Notes
Use this space to note the key elements of what you learned in performing this exercise. The notes can include problems encountered, solutions applied, useful commands employed, alternate solutions, methods, processes, procedure, and communication improvements.
