2.2.4.3 Lab – Relays (Answers)
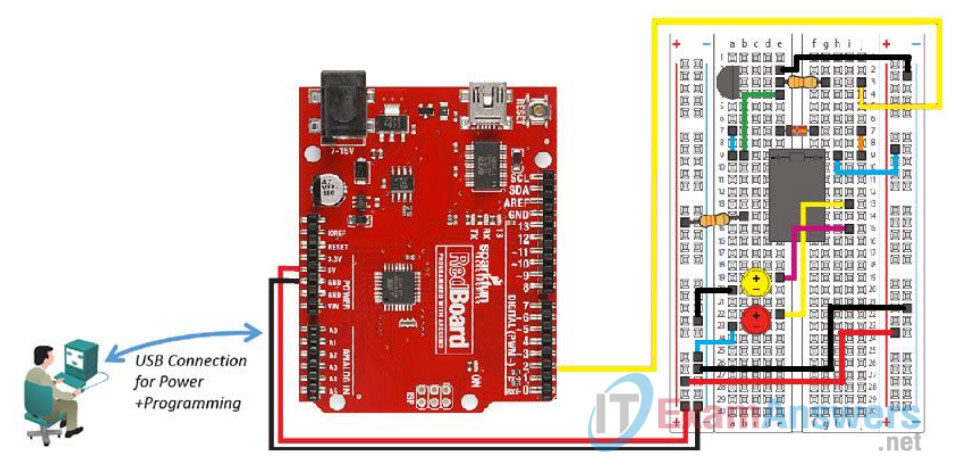
Topology

Objectives
- Set up the Relay circuit on the breadboard
- Load and run the sketch in the Arduino IDE
Background / Scenario
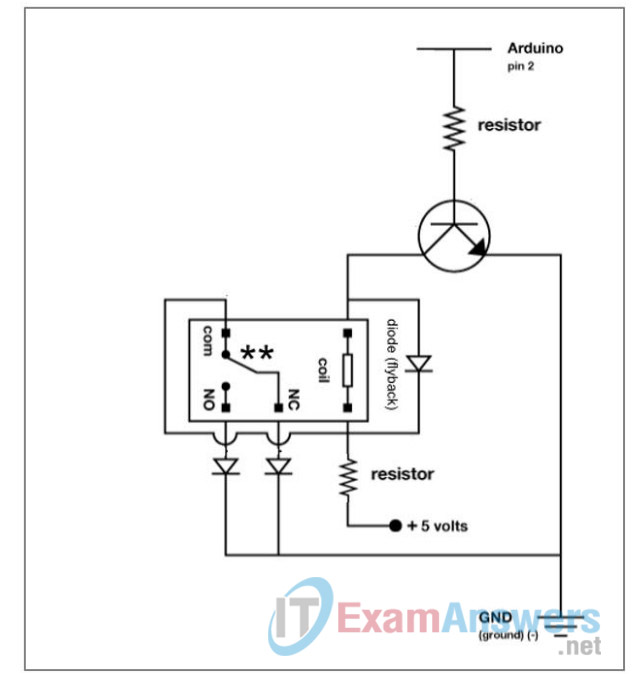
This lab will make use of a relay along with other components to serve as an electrically controlled mechanical switch.

Required Resources
- SparkFun Inventors Kit (SIK) or equivalent components
- PC configured with Arduino drivers and Arduino software
- SIK Guide Code example files
Step 1: Set up the Relay circuit on the Breadboard.
Refer to the Topology diagram for a visual reference of the following steps.
a. Select 2 – 330 Ohm (Ω) resistors, 4 black wires, 3 red wires, 3 blue wires, 2 yellow wires, 1 orange wire, 1 green wire, 1 yellow LED, 1 red LED, 1 transistor, 1 diode, and 1 relay.
Note: Refer to page 12 of the SIK Guide for assistance in identifying components. If wire colors are not available, they can be replaced with different colored wires.
b. Insert the 330 Ohm (Ω) resistors to the breadboard; connect one resister from e3 to g3; connect the other resistor from b14 to the (+) nearest column a.
c. Insert the transistor into sockets a2, a3, and a4. Pay close attention to the orientation of the transistor. The flat side of the transistor should run parallel to column b on the breadboard.
d. Insert the diode into sockets e7 and f7. The lead on the end with black stripe is inserted into f7 and the other lead into e7.
e. Insert the relay between columns e and f. Notice there are five pins on the relay, place the end with the 2 pins into e9 and f9. The three pins on the other end will insert into e14, f13, and f15. Make certain the pins are straightened out prior to attempting to insert in the sockets.
f. Insert the yellow LED with the longer lead (+), anode, in c19 and the shorter lead, cathode, in c20.
g. Insert the red LED with the longer lead (+), anode, in c22 and the shorter lead, cathode, in c23.
h. Connect one yellow wire from j3 on the breadboard to Digital Pin 2 on the RedBoard.
i. Connect a black wire from e2 to the (-) bar.
j. Connect a green wire from e4 to b9.
k. Connect a blue wire from a7 to a9.
l. Connect a blue wire from h9 to the (+) bar.
m. Connect the orange wire from j7 to j9.
n. Connect a yellow wire from i13 to e22.
o. Connect a red wire from i15 to e19.
p. Connect a black wire from a20 to the (-) bar.
q. Connect a blue wire from a23 to the (-) bar.
r. Use a black wire to create a jumper across the board from the left and right (-) bars.
s. Use a red wire to create a jumper across the board from the left and right (+) bars.
t. Connect a black wire from the negative (-) connector on the breadboard to the GND on the RedBoard.
u. Connect a red wire from the positive (+) connector on the breadboard to the 5V pin on the RedBoard.
Step 2: Load and run the sketch in the Arduino IDE.
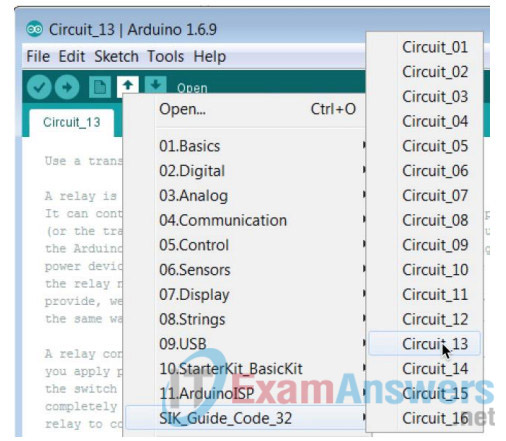
a. Click the up arrow icon in the Arduino IDE and select Circuit_13 from the SIK_Guide_Code_32 folder displayed.
Note: The SIK_Guide_Code_32 folder will only exist if the code has been downloaded from http://sparkfun.com/sikcode and copied to the examples folder located under the Arduino program files, typically C:\Program Files\Arduino\examples. In Linux, the libraries must be placed in /usr/share/arduino/libraries or ~/sketchbook/libraries. After installing/extracting, the Arduino IDE must be restarted.

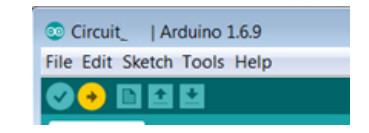
b. Verify and compile the sketch to create an executable firmware that can be uploaded to the Flash memory of the microcontroller.

c. Make sure the RedBoard is connected to the PC with the USB cable. Upload the firmware to the RedBoard.

Note: Once uploaded, the relay should cycle between open and closed causing the red and yellow LEDs to continuously change between on and off. You may need to press down on the relay if the LEDs do not light.
Reflection
Which line of code could be changed to speed up the alteration between LEDs? Show the code change in the space provided.
Answers may vary. Change the timeDelay line from const int to:
timeDelay const int = 500;
