6.4.1 Packet Tracer – Implement EtherChannel (Instructor Version)
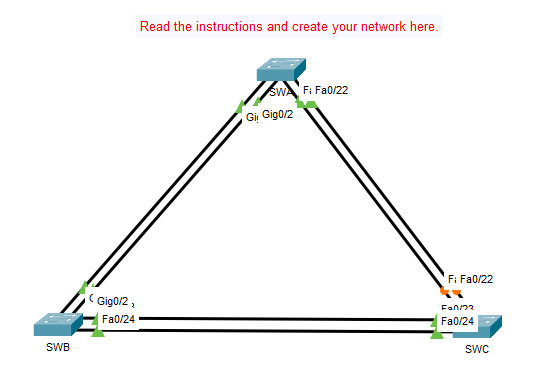
Topology

6.4.1 Packet Tracer – Implement EtherChannel
Objectives
- Part 1: Build the network
- Part 2: Configure EtherChannel
Background
You have been assigned the task of designing an EtherChannel implementation for a company that wants to improve the performance of their switch trunk links. You will try several different ways of implementing the EtherChannel links in order to evaluate which is the best for the company. You will build the topology, configure trunk ports, and implement LACP and PAgP EtherChannels.
Instructions
Part 1: Build the network.
Use the table below to build the switch topology.
Step 1: Obtain the devices that are required.
a. Click the Network Devices icon in the bottom tool bar.
b. Click the Switches entry in the submenu.
c. Locate the 2960 switch icon. Click and drag the icon for the 2960 switch into the topology area.
d. Repeat the step above so that there are three 2960 switches in the topology area.
e. Arrange the devices into a layout that you can work with by clicking and dragging.
Step 2: Name the devices.
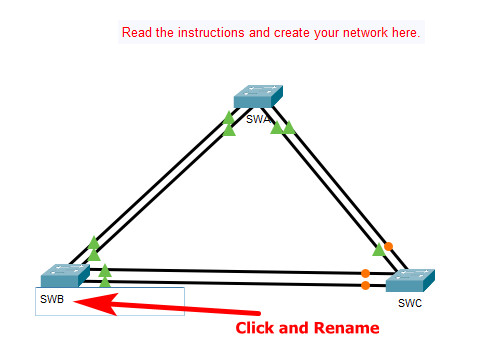
The devices have default names that you will need to change. You will name the devices SWA, SWB, and SWC. You are changing the display names of the devices. This is the text label that appears below each device. It is not the host name. Your display names must match the names that are given in this step exactly. If a display name does not match, you will not be scored for your device configuration.
a. Click the device display name that is below the device icon. A text field should appear with a flashing insertion point. If the configuration window for the device appears, close it and try again by clicking a little further away from the device icon.
b. Replace the current display name with the appropriate display name.
c. Repeat until all devices are named.
Change device display names by clicking on the device name in the topology and typing a new name. Whenever this is done, the device name is required to match the device name in the instructions exactly.

Step 3: Connect the devices.
a. Click the orange lightning bolt Connections icon in the bottom toolbar.
b. Locate the Ethernet straight-through cable icon. It looks like a solid black diagonal line.
c. To connect the device, click the Ethernet straight-through cable icon and then click the first device that you want to connect. Select the correct port and then click the second device. Select the correct port and the devices will be connected.
d. Connect the devices as specified in the table below.
| Port Channel | Devices | Port Connections | Type |
|---|---|---|---|
| 1 1 |
SWA to SWB | G0/1 to G0/1 | PAgP |
| G0/2 to G0/2 | |||
| 2 2 |
SWA to SWC | F0/21 to F0/21 | LACP |
| F0/22 to F0/22 | |||
| 3 3 |
SWB to SWC | F0/23 to F0/23 | LACP |
| F0/24 to F0/24 |
This activity requires some knowledge of how to build topologies in Packet Tracer. You may want to quickly train students on how to do the following:
1. Select specific device models and drag devices to the work area, specifically 2960 switches.
2. Select an Ethernet-straight through cable.
3. Connect devices with an Ethernet-copper straight through cable to specific device ports.
Part 2: Configure EtherChannel
On each switch, configure the ports that will be used in the Port Channels as static trunk ports.
Step 1: Configure a PAgP EtherChannel.
Follow the procedure that was used in previous activities to configure Port Channel 1 as a PAgP EtherChannel between SWA and SWB. Both sides should negotiate the EtherChannel.
Step 2: Configure a LACP EtherChannel.
Configure Port Channel 2 as an LACP channel between SWA and SWC. Both sides should negotiate the EtherChannel.
Step 3: Configure a Backup LACP EtherChannel
Configure Port Channel 3 channel as an LACP channel between SWB and SWC. In this case, SWC initiates negotiation with SWB. SWB does not initiate negotiation of the channel.
Answer Scripts
Switch SWA
ena
conf t
hostname SW1

interface GigabitEthernet0/1
switchport mode trunk
channel-group 1 mode desirable
interface GigabitEthernet0/2
switchport mode trunk
channel-group 1 mode desirable

interface FastEthernet0/21
switchport mode trunk
channel-group 2 mode active
interface FastEthernet0/22
switchport mode trunk
channel-group 2 mode active

interface FastEthernet0/23
interface FastEthernet0/24

end
Switch SWB
ena
conf t
hostname SWB

interface GigabitEthernet0/1
switchport mode trunk
channel-group 1 mode desirable
interface GigabitEthernet0/2
switchport mode trunk
channel-group 1 mode desirable

interface FastEthernet0/23
switchport mode trunk
channel-group 3 mode passive
interface FastEthernet0/24
switchport mode trunk
channel-group 3 mode passive

end
Switch SWC
ena
conf t
hostname SWC

interface FastEthernet0/21
switchport mode trunk
channel-group 2 mode active
interface FastEthernet0/22
switchport mode trunk
channel-group 2 mode active

interface FastEthernet0/23
switchport mode trunk
channel-group 3 mode active
interface FastEthernet0/24
switchport mode trunk
channel-group 3 mode active

end

thank you so much for help me.
where can i find the PKA file
download has zero% completion
Yeah, that’s how it works….The commands are literally right there…surely you can’t be that lazy…
You should check your motives on how you are “helping” people. Not friendly at all.
thank you so much for help me.
It Says Wrong TYPE on All Switches.
What I Have to DO ?
You need to use the 2960 Switches. Elaborate more on your error please.