
17.8.1 Packet Tracer - Design and Build a Small Network - Physical Mode Answers
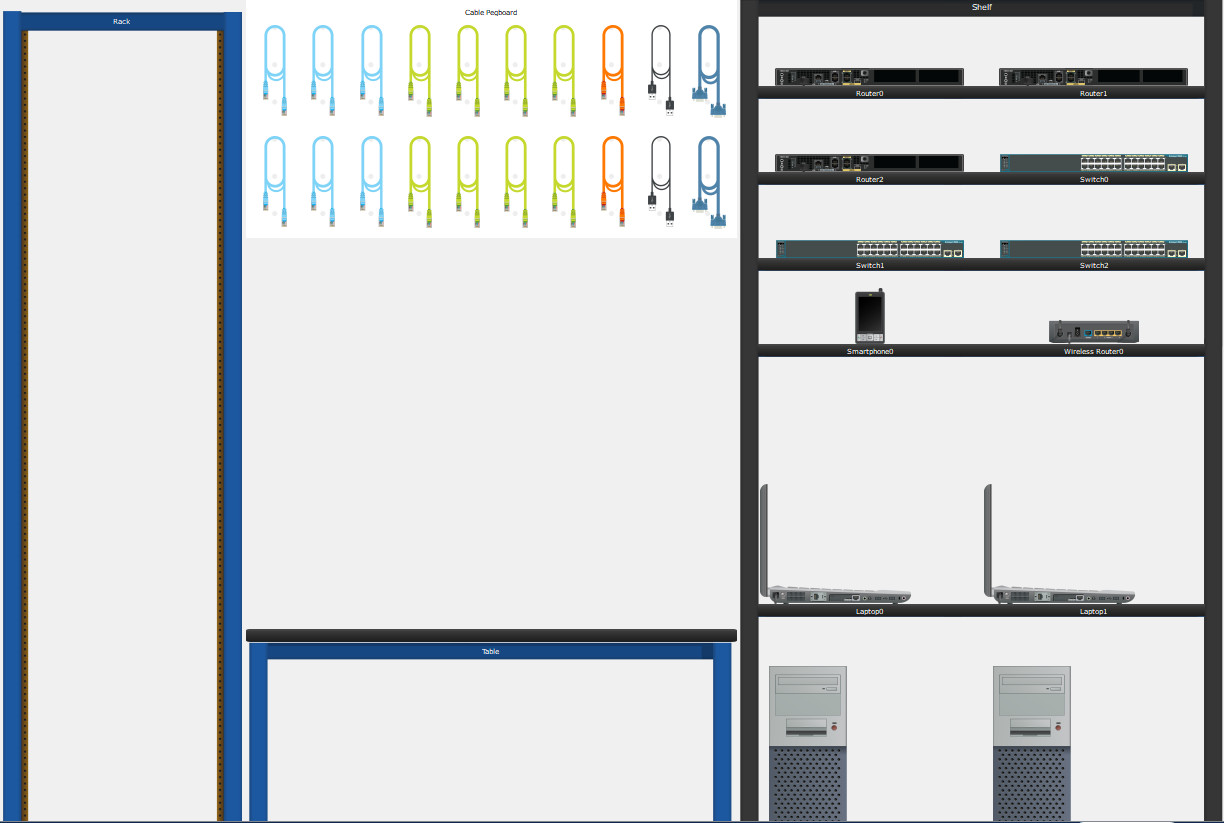
17.8.1 Packet Tracer – Design and Build a Small Network – Physical Mode
Objectives
Explain how a small network of directly connected segments is created, configured, and verified.
Background /Scenario
In this Packet Tracer Physical Mode (PTPM) activity, you will design and build a network from scratch. Your design must include a minimum of one Cisco 4321 router, two Cisco 2960 switches, and two PCs. Fully configure the network and use IPv4 or IPv6 (subnetting must be included as a part of your addressing scheme). Verify the network using at least five show commands. Secure the network using SSH, secure passwords, and console passwords (minimum).
Reflection Questions
1. What was the most difficult portion of this activity?
Answers will vary.
2. Why do you think network documentation is so important to this activity and in the real world?
Documentation is imperative to good network management. Without it, network administrators have to recreate topologies, physically check addressing, etc. This takes time, which could be used elsewhere.
Create a small network of directly connected segments, at a minimum 1 router, 2 switches and 2 PCs, and include a screenshot of the network in your final documentation.
Sample Topology:
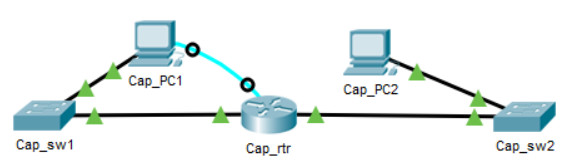
Configure the network to include switches, routers, and end devices and use your own network addressing.You must use subnetting of some type and you can use either IPv4 or IPv6 logical addressing. Create a table showing your physical addressing scheme for the router, switch, and PC and include it in your final documentation.
| Device Name | IP Address | Subnet Mask |
|---|---|---|
| Cap_rtr | G0/0/0 – 192.168.1.1 G0/0/1 – 192.168.1.33 |
255.255.255.224 255.255.255.224 |
| Cap_sw1 | VLAN1 – 192.168.1.20 | 255.255.255.224 |
| Cap_sw2 | VLAN1 – 192.168.1.62 | 255.255.255.224 |
| Cap_PC1 | F0 – 192.168.1.10 | 255.255.255.224 |
| Cap_PC2 | F0 – 192.168.1.40 | 255.255.255.224 |
Verify the network by using show commands (at least 5) to provide a performance baseline. Be able to discuss why you chose the show commands you selected and what the output means (use all Packet Tracer activities for modules 1-17). Keep screenshots of your output and include in your final documentation.
Sample Show Command Output
Cap_rtr# show arp

ProtocolAddressAge (min)Hardware AddrTypeInterface

Internet192.168.1.1–00D0.9741.9101ARPAGigabitEthernet0/0/0

Internet192.168.1.101000A.4120.9039ARPAGigabitEthernet0/0/0

Internet192.168.1.33–00D0.9741.9102ARPAGigabitEthernet0/0/1

Internet192.168.1.40100D0.BCC3.BBEBARPAGigabitEthernet0/0/1

Internet192.168.1.6200060.4779.5A11ARPAGigabitEthernet0/0/1

Cap_rtr# show int g0/0/0

GigabitEthernet0/0/0 is up, line protocol is up (connected)

Hardware is Lance, address is 00d0.9741.9101 (bia 00d0.9741.9101)

Internet address is 192.168.1.1/27

MTU 1500 bytes, BW 1000000 Kbit, DLY 100 usec,

reliability 255/255, txload 1/255, rxload 1/255

Encapsulation ARPA, loopback not set

Full-duplex, 100Mb/s, media type is RJ45

ARP type: ARPA, ARP Timeout 04:00:00,

Last input 00:00:08, output 00:00:05, output hang never

Last clearing of “show interface” counters never

Input queue: 0/75/0 (size/max/drops); Total output drops: 0

Queueing strategy: fifo

Output queue :0/40 (size/max)

5 minute input rate 27 bits/sec, 0 packets/sec

5 minute output rate 23 bits/sec, 0 packets/sec

8 packets input, 1024 bytes, 0 no buffer

Received 0 broadcasts, 0 runts, 0 giants, 0 throttles

0 input errors, 0 CRC, 0 frame, 0 overrun, 0 ignored, 0 abort

0 input packets with dribble condition detected

7 packets output, 896 bytes, 0 underruns

0 output errors, 0 collisions, 1 interface resets

0 babbles, 0 late collision, 0 deferred

0 lost carrier, 0 no carrier

0 output buffer failures, 0 output buffers swapped out

Cap_rtr# show ip route

Codes: L – local, C – connected, S – static, R – RIP, M – mobile, B – BGP

D – EIGRP, EX – EIGRP external, O – OSPF, IA – OSPF inter area

N1 – OSPF NSSA external type 1, N2 – OSPF NSSA external type 2

E1 – OSPF external type 1, E2 – OSPF external type 2, E – EGP

i – IS-IS, L1 – IS-IS level-1, L2 – IS-IS level-2, ia – IS-IS inter area

* – candidate default, U – per-user static route, o – ODR

P – periodic downloaded static route

Gateway of last resort is not set

192.168.1.0/24 is variably subnetted, 4 subnets, 2 masks

C 192.168.1.0/27 is directly connected, GigabitEthernet0/0/0

L 192.168.1.1/32 is directly connected, GigabitEthernet0/0/0

C 192.168.1.32/27 is directly connected, GigabitEthernet0/0/1

L 192.168.1.33/32 is directly connected, GigabitEthernet0/0/1

Cap_sw1# show vlan brief

VLAN Name Status Ports

—- ——————————– ——— ——————————-

1 default activeFa0/1, Fa0/2, Fa0/3, Fa0/4

Fa0/5, Fa0/6, Fa0/7, Fa0/8

Fa0/9, Fa0/10, Fa0/11, Fa0/12

Fa0/13, Fa0/14, Fa0/15, Fa0/16

Fa0/17, Fa0/18, Fa0/19, Fa0/20

Fa0/21, Fa0/22, Fa0/23, Fa0/24

Gig0/1, Gig0/2

1002 fddi-default active

1003 token-ring-defaultactive

1004 fddinet-default active

1005 trnet-default active

Cap_sw2> traceroute 192.168.1.10

Type escape sequence to abort.

Tracing the route to 192.168.1.10

1 192.168.1.33 39 msec 0 msec 0 msec

2 192.168.1.10 13 msec 21 msec 15 msec
Secure the network using common configuration to include SSH, secure passwords, console security, etc. and verify the commands configured by enacting a show running-configuration screen as output. Include in your final documentation.
Device Configs - Final
ROUTER Cap_rtr
! ==============================================================
!--- 17.8.1 Packet Tracer - Design and Build a Small Network (Physical Mode)
!--- ANSWER SCRIPT FOR ROUTER Cap_rtr  |  SAMPLE DESIGN
!--- Usage: copy this whole file and paste it into the ROUTER Cap_rtr terminal (start at the Router> prompt). Every line beginning with "!" is a comment; IOS ignores it, so pasting a comment by accident is harmless.
!--- NOTE: This is an open-ended design activity - you choose your own names, addresses and subnetting. The values below follow the sample answer (192.168.1.0/24 split into two /27 subnets). Substitute your own scheme if your design differs.
! ==============================================================

enable
configure terminal

! --------------------------------------------------------------
!--- Basic settings and security (SSH, secure passwords, console)
! --------------------------------------------------------------

!--- Assign the device name.
hostname Cap_rtr

!--- Disable DNS lookup so mistyped commands are not treated as host names.
no ip domain-lookup

!--- Set the encrypted privileged EXEC password.
enable secret class

!--- Console security: password + require login using the local user database.
line console 0
 password cisco
 login local
 exit

!--- Set the domain name (required before RSA keys can be generated for SSH).
ip domain-name capstone.lab

!--- Create the local user account used for SSH login.
username SSHAdmin secret cisco12345

!--- Generate the RSA key pair for SSH. This one-line form supplies the modulus, so there is no interactive prompt to answer.
crypto key generate rsa general-keys modulus 1024

!--- VTY lines: accept SSH only and authenticate against the local user database.
line vty 0 4
 password cisco
 login local
 transport input ssh
 exit

!--- Encrypt all plaintext passwords in the configuration.
service password-encryption

! --------------------------------------------------------------
!--- Interfaces - one /27 subnet per LAN (subnetting requirement)
! --------------------------------------------------------------

!--- G0/0/0 - LAN 1 gateway: first host of 192.168.1.0/27 (Cap_sw1 / Cap_PC1).
interface g0/0/0
 description LAN1 - Cap_sw1
 ip address 192.168.1.1 255.255.255.224
 no shutdown
 exit

!--- G0/0/1 - LAN 2 gateway: first host of 192.168.1.32/27 (Cap_sw2 / Cap_PC2).
interface g0/0/1
 description LAN2 - Cap_sw2
 ip address 192.168.1.33 255.255.255.224
 no shutdown
 exit

end

! --------------------------------------------------------------
!--- Save the configuration to NVRAM. (Press Enter when prompted.)
! --------------------------------------------------------------
copy running-config startup-config


! ==============================================================
!--- Verification (the activity requires at least five show commands):
!---   show ip interface brief  -> both interfaces up/up with their IPs
!---   show ip route            -> two directly connected /27 subnets
!---   show interfaces g0/0/0   -> speed, duplex, error counters (baseline)
!---   show arp                 -> MAC-to-IP bindings learned on each LAN
!---   show running-config      -> confirm SSH, secure passwords, console
!---   show ip ssh              -> SSH enabled, RSA key present
! ==============================================================
SWITCH Cap_sw1
! ==============================================================
!--- 17.8.1 Packet Tracer - Design and Build a Small Network (Physical Mode)
!--- ANSWER SCRIPT FOR SWITCH Cap_sw1  |  SAMPLE DESIGN
!--- Usage: copy this whole file and paste it into the SWITCH Cap_sw1 terminal (start at the Switch> prompt). Every line beginning with "!" is a comment; IOS ignores it, so pasting a comment by accident is harmless.
!--- NOTE: This is an open-ended design activity - you choose your own names, addresses and subnetting. The values below follow the sample answer (192.168.1.0/24 split into two /27 subnets). Substitute your own scheme if your design differs.
! ==============================================================

enable
configure terminal

! --------------------------------------------------------------
!--- Basic settings and security (SSH, secure passwords, console)
! --------------------------------------------------------------

!--- Assign the device name.
hostname Cap_sw1

!--- Disable DNS lookup so mistyped commands are not treated as host names.
no ip domain-lookup

!--- Set the encrypted privileged EXEC password.
enable secret class

!--- Console security: password + require login using the local user database.
line console 0
 password cisco
 login local
 exit

!--- Set the domain name (required before RSA keys can be generated for SSH).
ip domain-name capstone.lab

!--- Create the local user account used for SSH login.
username SSHAdmin secret cisco12345

!--- Generate the RSA key pair for SSH. This one-line form supplies the modulus, so there is no interactive prompt to answer.
crypto key generate rsa general-keys modulus 1024

!--- VTY lines: accept SSH only and authenticate against the local user database.
line vty 0 15
 password cisco
 login local
 transport input ssh
 exit

!--- Encrypt all plaintext passwords in the configuration.
service password-encryption

! --------------------------------------------------------------
!--- Management interface
! --------------------------------------------------------------

!--- VLAN 1 management SVI, inside the same /27 subnet as Cap_PC1.
interface vlan 1
 ip address 192.168.1.20 255.255.255.224
 no shutdown
 exit

!--- Default gateway (the Cap_rtr interface on this LAN) so the switch is manageable from the other subnet.
ip default-gateway 192.168.1.1

end

! --------------------------------------------------------------
!--- Save the configuration to NVRAM. (Press Enter when prompted.)
! --------------------------------------------------------------
copy running-config startup-config


! ==============================================================
!--- Verification:
!---   show ip interface brief  -> VLAN 1 up/up with its IP
!---   show vlan brief          -> port-to-VLAN assignments
!---   show ip ssh              -> SSH enabled, RSA key present
!---   ping 192.168.1.1          -> reach the default gateway
! ==============================================================
SWITCH Cap_sw2
! ==============================================================
!--- 17.8.1 Packet Tracer - Design and Build a Small Network (Physical Mode)
!--- ANSWER SCRIPT FOR SWITCH Cap_sw2  |  SAMPLE DESIGN
!--- Usage: copy this whole file and paste it into the SWITCH Cap_sw2 terminal (start at the Switch> prompt). Every line beginning with "!" is a comment; IOS ignores it, so pasting a comment by accident is harmless.
!--- NOTE: This is an open-ended design activity - you choose your own names, addresses and subnetting. The values below follow the sample answer (192.168.1.0/24 split into two /27 subnets). Substitute your own scheme if your design differs.
! ==============================================================

enable
configure terminal

! --------------------------------------------------------------
!--- Basic settings and security (SSH, secure passwords, console)
! --------------------------------------------------------------

!--- Assign the device name.
hostname Cap_sw2

!--- Disable DNS lookup so mistyped commands are not treated as host names.
no ip domain-lookup

!--- Set the encrypted privileged EXEC password.
enable secret class

!--- Console security: password + require login using the local user database.
line console 0
 password cisco
 login local
 exit

!--- Set the domain name (required before RSA keys can be generated for SSH).
ip domain-name capstone.lab

!--- Create the local user account used for SSH login.
username SSHAdmin secret cisco12345

!--- Generate the RSA key pair for SSH. This one-line form supplies the modulus, so there is no interactive prompt to answer.
crypto key generate rsa general-keys modulus 1024

!--- VTY lines: accept SSH only and authenticate against the local user database.
line vty 0 15
 password cisco
 login local
 transport input ssh
 exit

!--- Encrypt all plaintext passwords in the configuration.
service password-encryption

! --------------------------------------------------------------
!--- Management interface
! --------------------------------------------------------------

!--- VLAN 1 management SVI, inside the same /27 subnet as Cap_PC2.
interface vlan 1
 ip address 192.168.1.62 255.255.255.224
 no shutdown
 exit

!--- Default gateway (the Cap_rtr interface on this LAN) so the switch is manageable from the other subnet.
ip default-gateway 192.168.1.33

end

! --------------------------------------------------------------
!--- Save the configuration to NVRAM. (Press Enter when prompted.)
! --------------------------------------------------------------
copy running-config startup-config


! ==============================================================
!--- Verification:
!---   show ip interface brief  -> VLAN 1 up/up with its IP
!---   show vlan brief          -> port-to-VLAN assignments
!---   show ip ssh              -> SSH enabled, RSA key present
!---   ping 192.168.1.33          -> reach the default gateway
! ==============================================================
Identify elements of the model that map to real-world applications:
All facets of this activity map to IT-related content and real-world applications because this is a culminating activity for all the modules.
Download Packet Tracer (.pka) file:


