12.2.5.8 Packet Tracer – Configure Wireless Security (Answers)
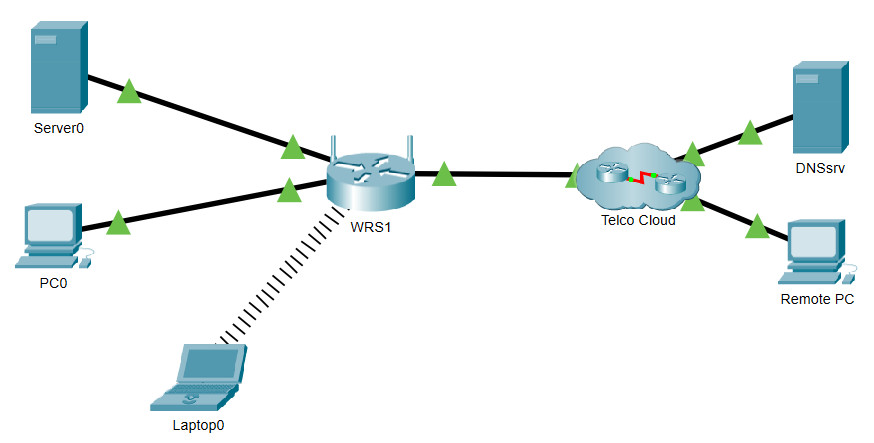
Topology

Objectives
- Configure WPA2 on a wireless router.
- Configure MAC Filtering on a wireless router.
- Configure Single Port Forwarding on a wireless router.
Introduction
In this activity, you will configure a wireless router to:
- Use WPA2 Personal as security method
- Rely on MAC filtering to increase security
- Support Single Port Forwarding
Step 1: Connect to the wireless router
a. Connect to the wireless router configuration web page at 192.168.0.1 from PC0.
b. Use admin for both the user name and password.
Step 2: Configure WPA2 security on the wireless router.
a. Click Wireless > Wireless Security. Change Security Mode to WPA2 Personal. AES is currently the strongest encryption protocol available. Leave it selected.
b. Configure the passphrase as aCompWiFi. Scroll to the bottom of the window and click Save Settings.
Step 3: Configure Laptop0 as a wireless client.
a. Connect Laptop0 to the WRS1 wireless network using the security settings you configured on the wireless router.
b. Close the PC Wireless window and click Command Prompt.
c. Type ipconfig /all and take note of the IP address and MAC addresses.
Step 4: Configure WRS1 to support MAC filtering.
a. On PC0, go to the wireless router’s configuration page.
b. Navigate to Wireless > Wireless MAC Filter.
c. Select Enabled and Permit PCs listed below to access wireless network.
d. Type in the MAC address for Laptop0 in the MAC 01: field. Notice the MAC address must be in the XX:XX:XX:XX:XX:XX format.
e. Scroll to the bottom of the window and click Save Settings.
f. Reconnect Laptop0 to the WRS1 network.
Step 5: Test the MAC filtering of WRS1
a. Add a second laptop to the topology. By default, this is Laptop1.
b. Press the power button on Laptop1 to turn it off.
c. Drag the Ethernet port to the Modules list to remove it.
d. Drag the WPC300N module to the empty slot on Laptop1 and press the power button to boot Laptop1.
e. Connect Laptop1 to the WRS1 network.
Why are you unable to associate with the access point?
Because Laptop0’s MAC address is the only one specified, Laptop0 is the only wireless device currently capable of associating to WRS1.
Step 6: Test connectivity through the Telco Cloud.
a. Open a Command Prompt on Laptop0.
b. Test connectivity to Remote PC by issuing the ping 200.100.50.10 command. The first few pings may fail while the network converges. Issue the command again if you did not get successful replies.
c. Open Remote PC and then browse to the address of the internal web page hosted at Server0, which is www.acompany.com. A Request Timeout message should display. A webpage requests from Remote PC to Server0 is not successful because WRS1 does not know which internal device should get it. In order to accomplish that, port forwarding must be configured.
Step 7: Configure WRS1 to forward a single port to Server0.
a. On PC0, reconnect to the wireless router’s configuration page.
b. Navigate to Application & Gaming > Single Port Forwarding.
c. On the left-hand menu, choose HTTP from the first drop-down box. Change the To IP Address to match Server0’s IP address, 192.168.0.20. Also, check the Enabled check box at the end of the row.
d. Scroll to the bottom of the window and click Save Settings.
e. You should now be able to reach the webpage hosted on Server0. Browse to www.acompany.com on Remote PC. You should now see the web page hosted by Server0.
Check your score. You should now have 100%.
