5.1.4.4 Lab – Data Migration in Windows (Answers)
Introduction
When a new computer is purchased or a new operating system is installed, it is often desirable to migrate a user’s data to the new computer or OS. Windows has a built-in tool called Windows Easy Transfer that allows you to select files and folders to migrate. These files and folders are written to a file which is used to restore them to the same locations on the new computer or OS.
The Windows Easy Transfer tool cannot be used to migrate from Windows 8.1 to another installation of Windows 8.1, so instructions are not included in this lab. Also, Windows 8.0 has the same steps and screens that are used by Windows 7, but the windows look slightly different, so Windows 8.0 instructions are not included in this lab.
Recommended Equipment
The following equipment is required:
- A computer with Windows 7 installed
- A USB flash drive
Part 1: Windows 7
Step 1: Prepare for data migration
a. Log on to the computer.
b. Right-click the desktop and choose New > Folder.
c. Type For Transferring and press Enter to name the folder.
d. Click Start > All Programs > Accessories > Notepad to open Notepad.
e. Type From older PC in Notepad.
f. Click File > Save As..
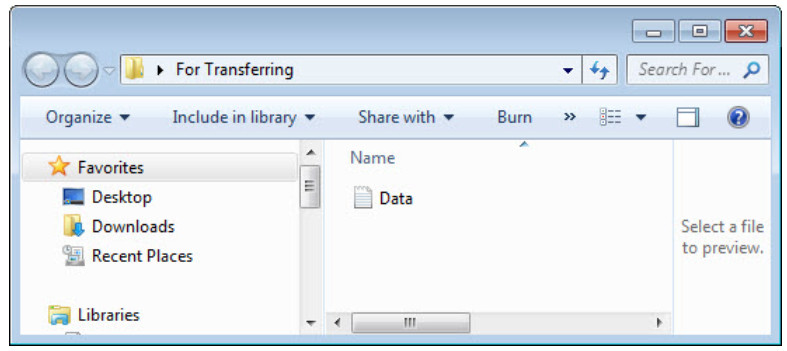
g. Navigate to Desktop > For Transferring.
h. Type Data in the File Name box and press Enter.
i. Click File > Exit.
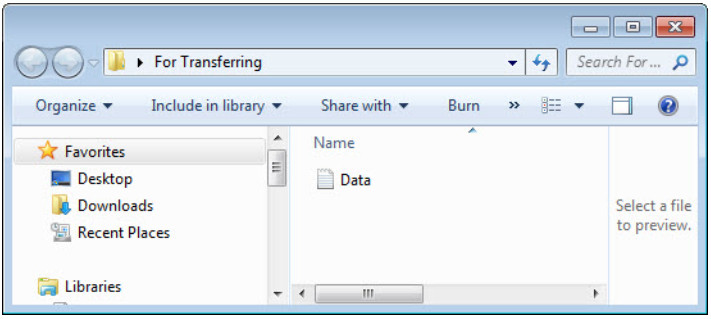
j. You should now have a file named Data in a folder called For Transferring.
Step 2: Prepare the flash drive
a. Open the For Transferring folder.
b. Connect the USB flash drive to the computer.
c. Navigate to Computer and open the USB flash drive.
d. Create a folder on the USB flash drive and name it Transfer data files.
Step 3: Create the Easy Transfer file
a. Click Start > All Programs > Accessories > System Tools > Windows Easy Transfer. The Windows Easy Transfer window opens.
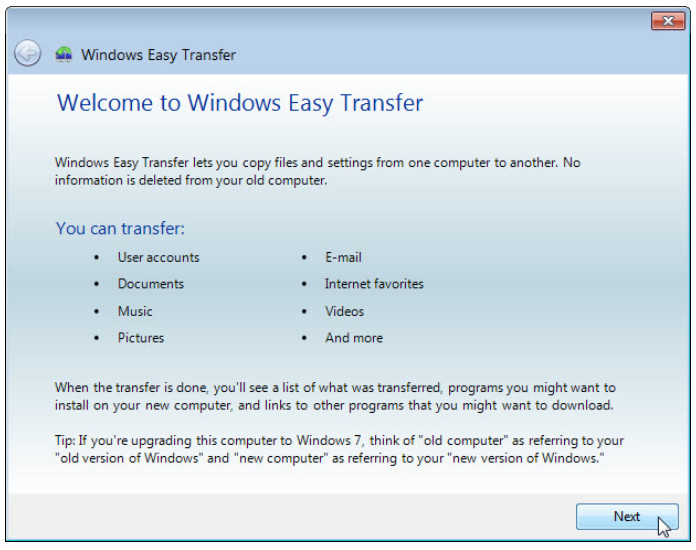
b. Click Next. The What do you want to use to transfer items to your new computer? window opens.
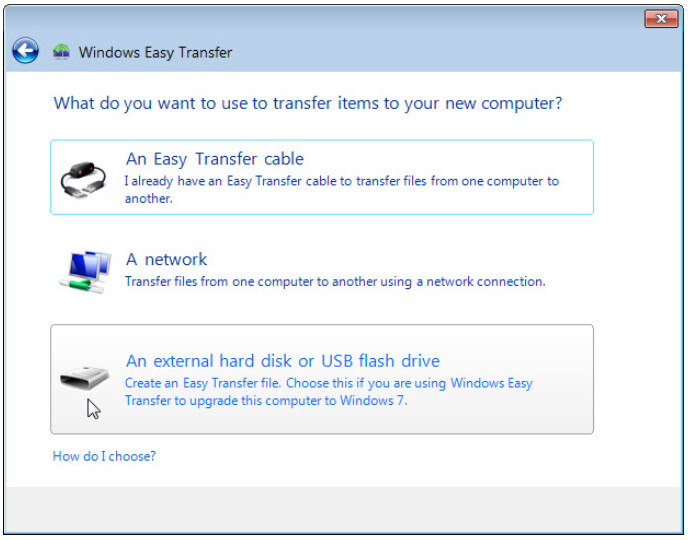
c. Click An external hard disk or USB flash drive. The Which computer are you using now? window opens.
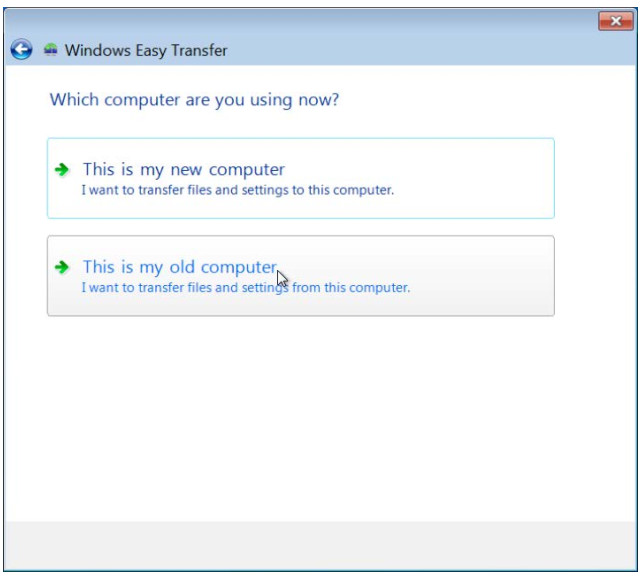
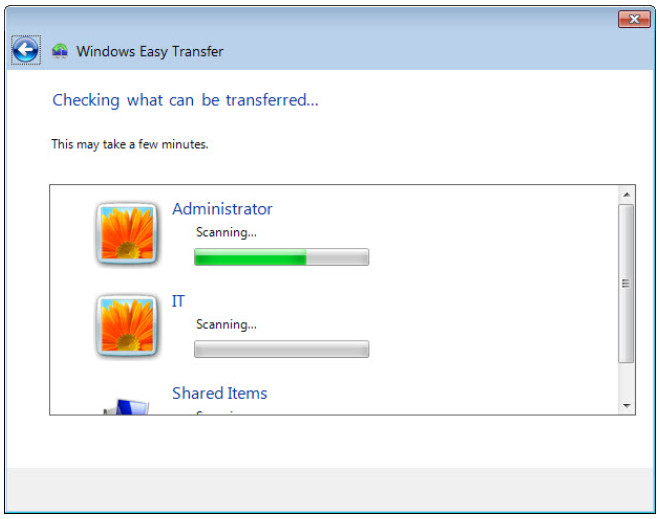
d. Click This is my old computer. The Checking what can be transferred… window opens.
The Choose what to transfer from this computer window opens.
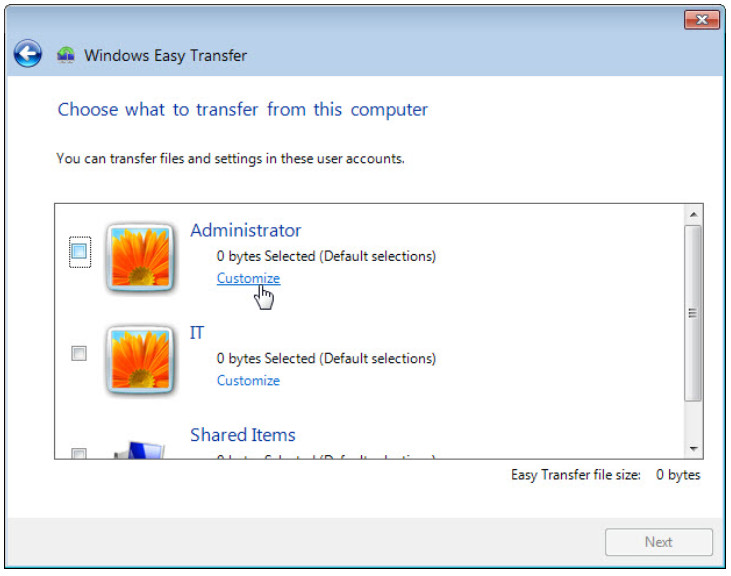
e. Uncheck the box next to each account.
f. Click Customize for the account to which you are logged in.
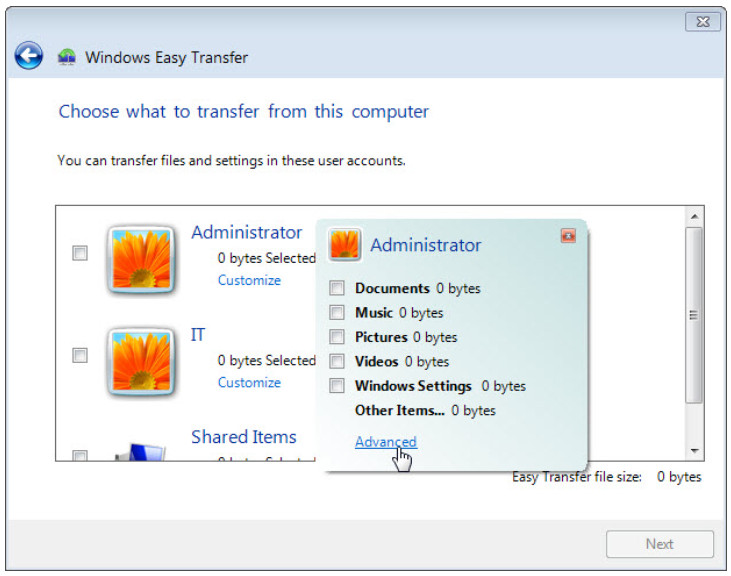
g. When the customize window opens, click Advanced.
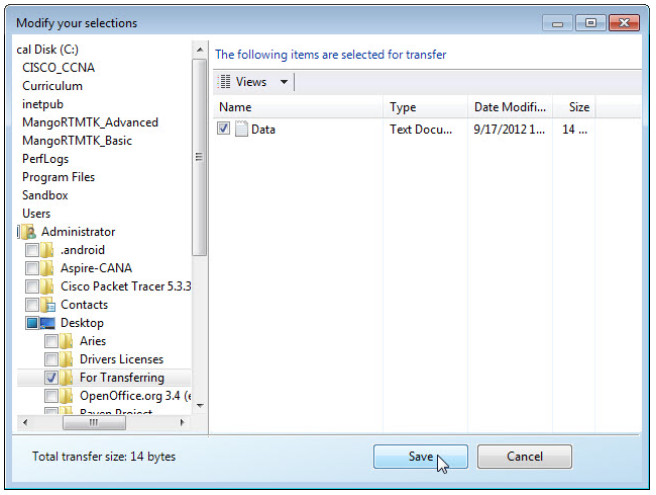
h. Navigate to the For Transferring folder that is on the desktop. This will be the location where files are transferred from.
i. Select the Data file and click Save. The Choose what to transfer from this computer window opens.
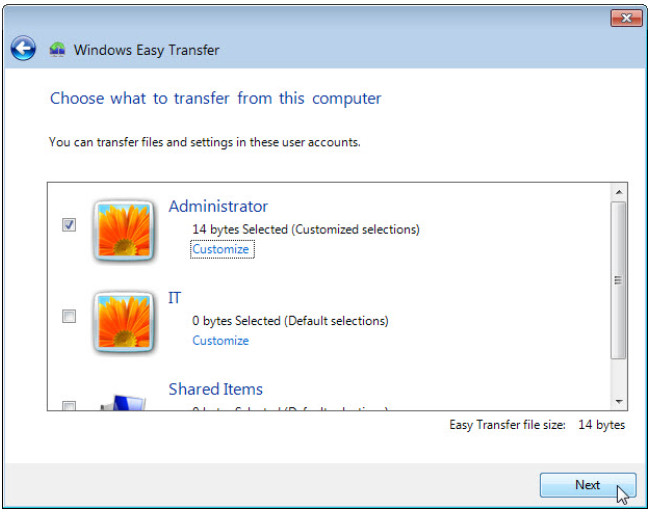
What is the size of the file being transferred?
Answers may vary. It will depend on the amount of data stored in the selected account(s) 14 bytes.
j. Click Next. The Save your files and settings for transfer window opens.
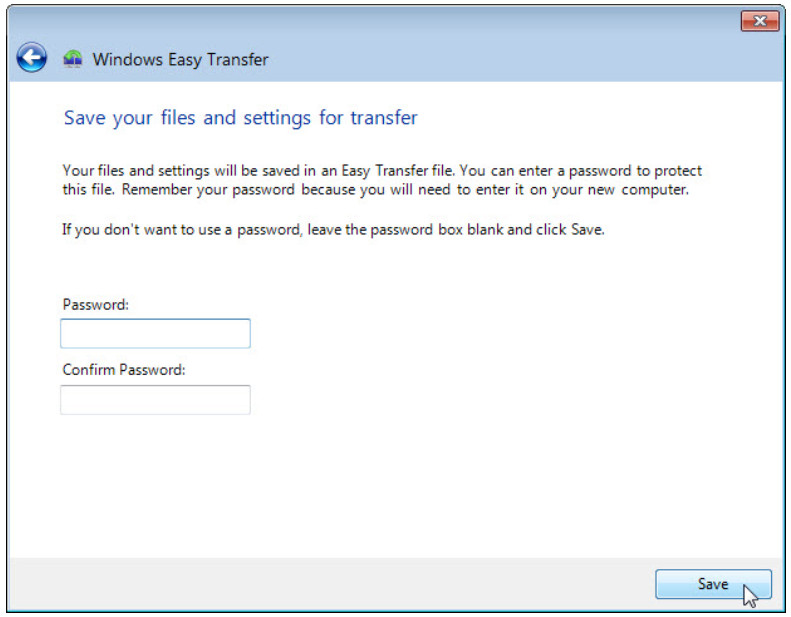
Because you are transferring the files back to the same computer, a password is not required.
k. Click Save.
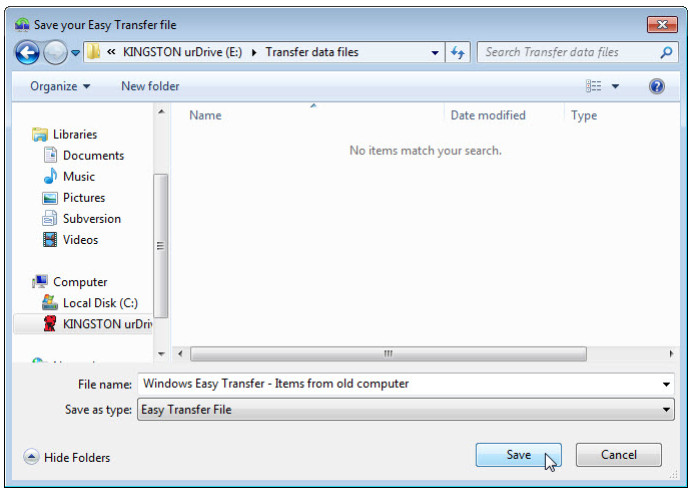
l. Locate the folder called Transfer data files on the USB flash drive and click Save. The These files and settings have been saved for your transfer window opens.
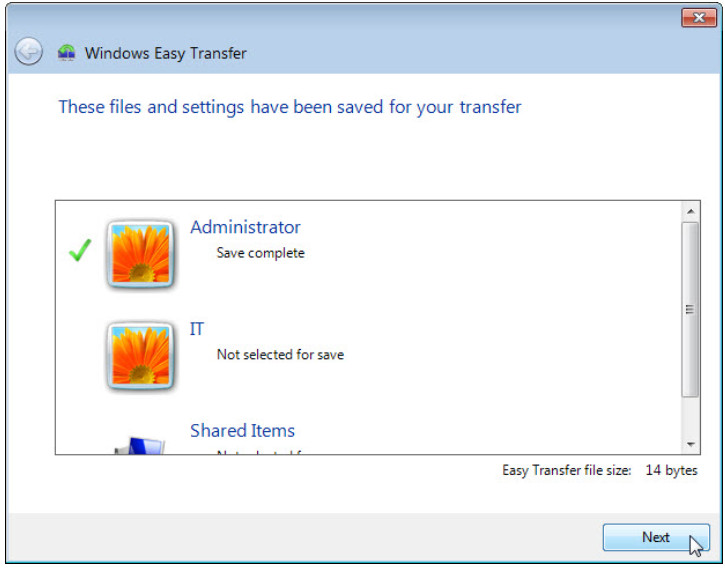
m. Click Next. The Your transfer file is complete window opens.
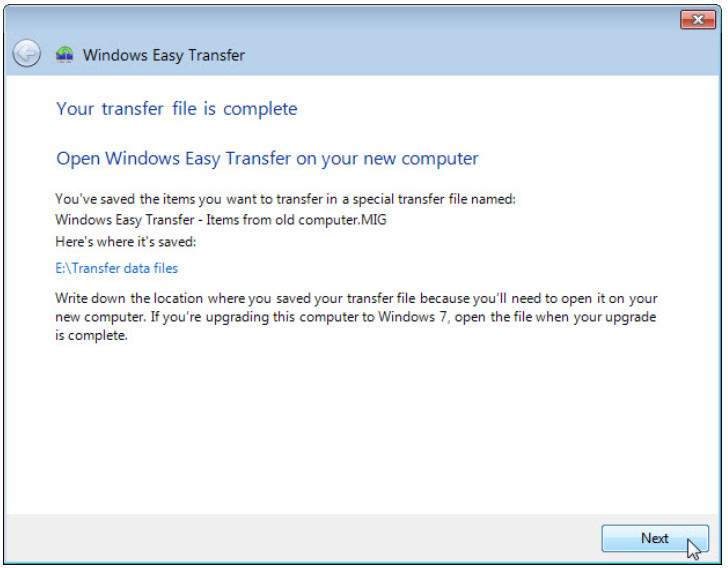
n. Click Next. The Windows Easy Transfer is complete on this computer window opens.
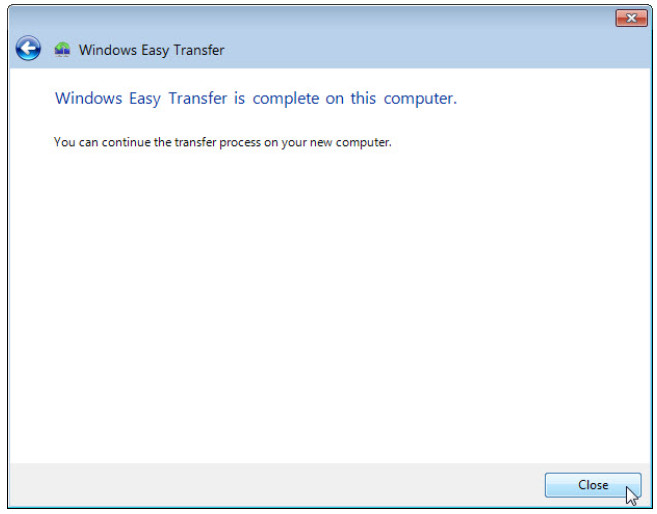
o. Click Close.
Step 4: Delete the original data
a. Locate and delete the Data file in the For Transferring folder that is located on the desktop.
b. Right-click the Recycle Bin > Empty Recycle Bin.
Step 5: Receive the transfer file
a. Click Start > All Programs > Accessories > System Tools > Windows Easy Transfer. The Welcome to Windows Easy Transfer window opens.
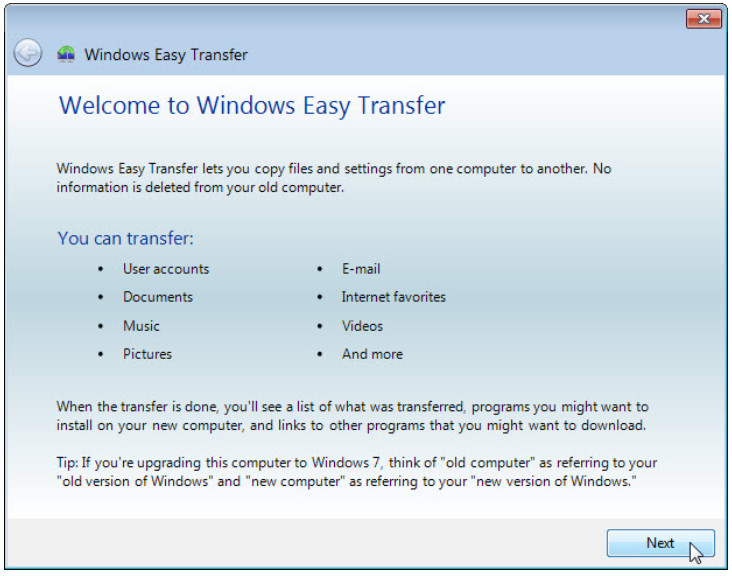
b. Click Next. The What do you want to use to transfer items to your new computer? window opens.
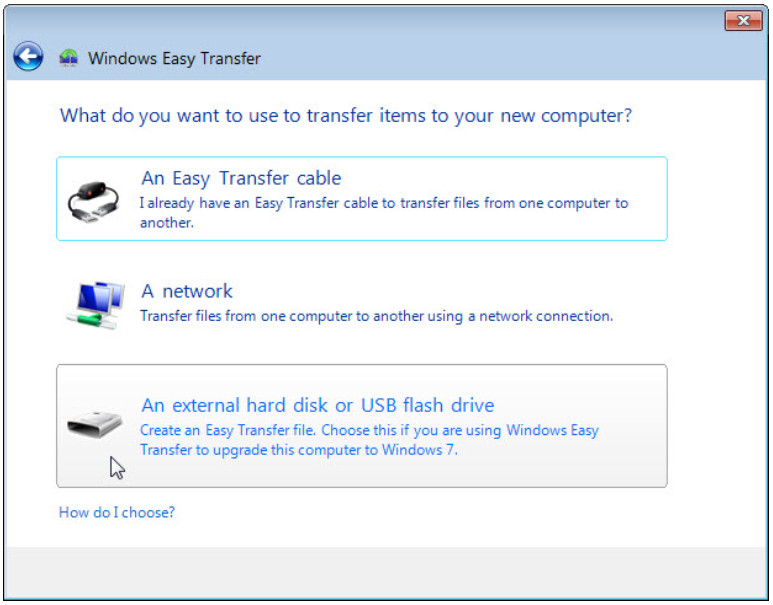
c. Select An external hard disk or USB flash drive. The Which computer are you using now? window opens.
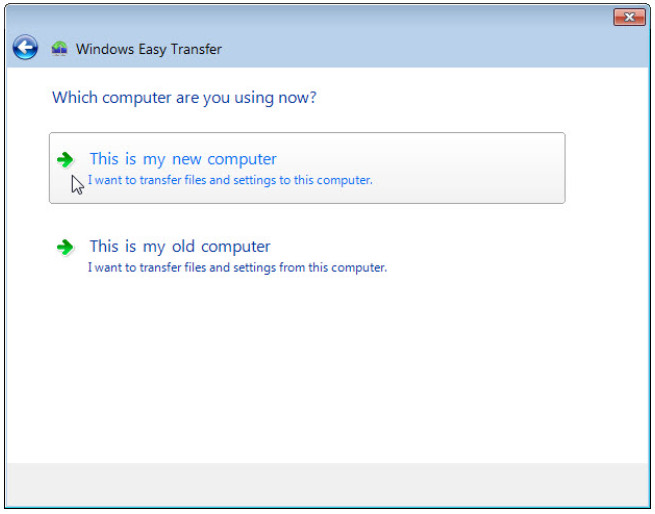
d. Select This is my new computer. The Has Windows Easy Transfer already saved your files from your old computer to an external hard disk or USB flash drive? window opens.
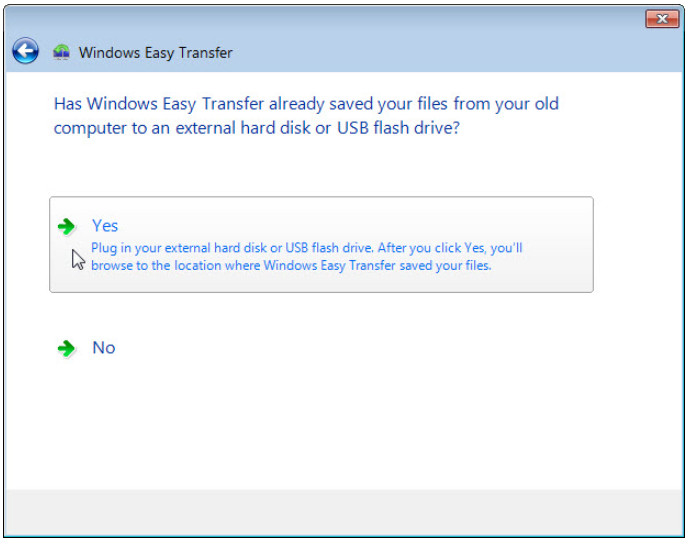
e. Click Yes.
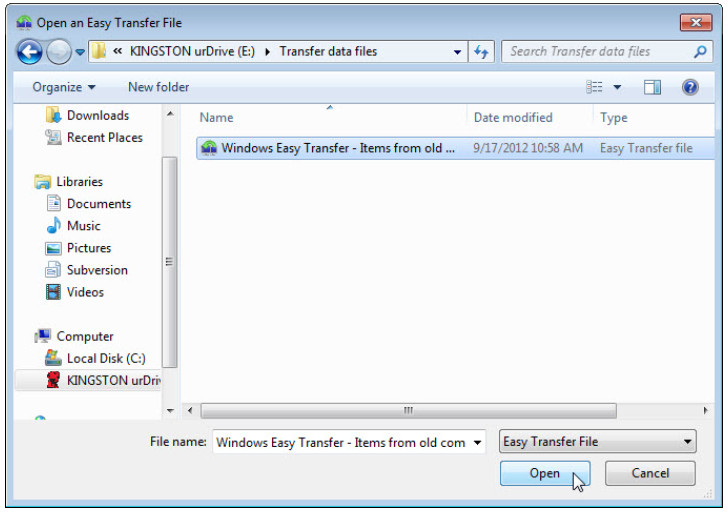
f. Locate and open the Transfer data files folder on the USB flash drive.
g. Select the Windows Easy Transfer file, and then click Open. The Choose what to transfer to this computer window opens.
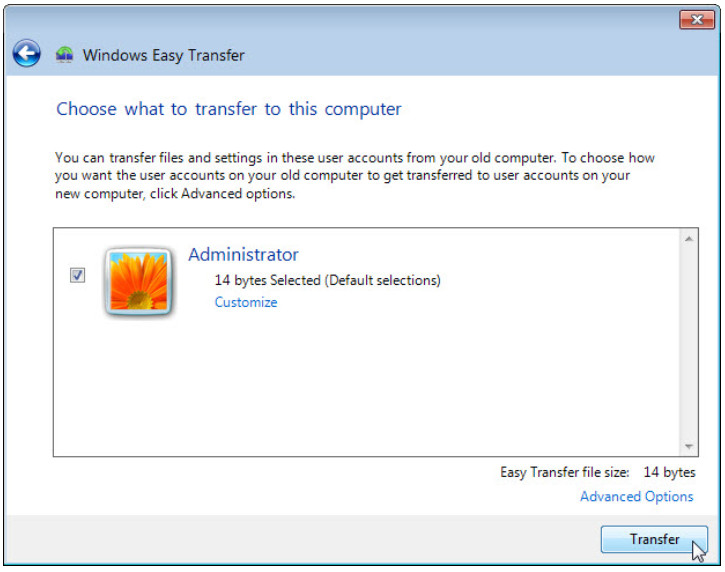
h. Click Transfer. The Transfer items to this computer window opens.
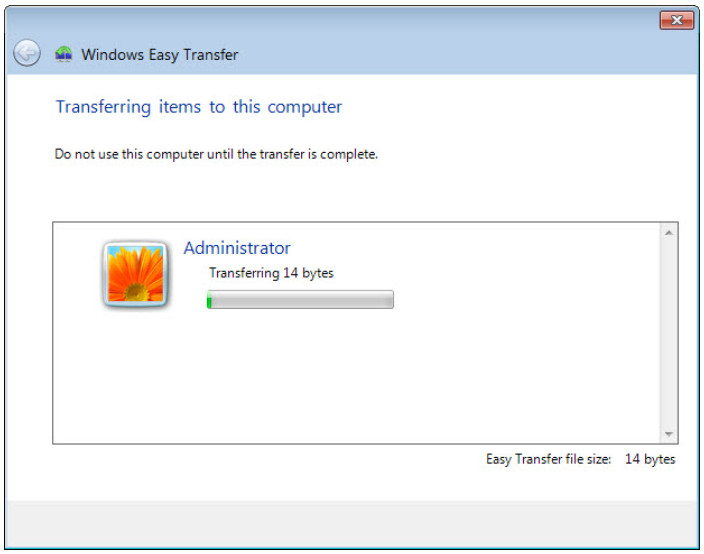
The Your transfer is complete window opens.
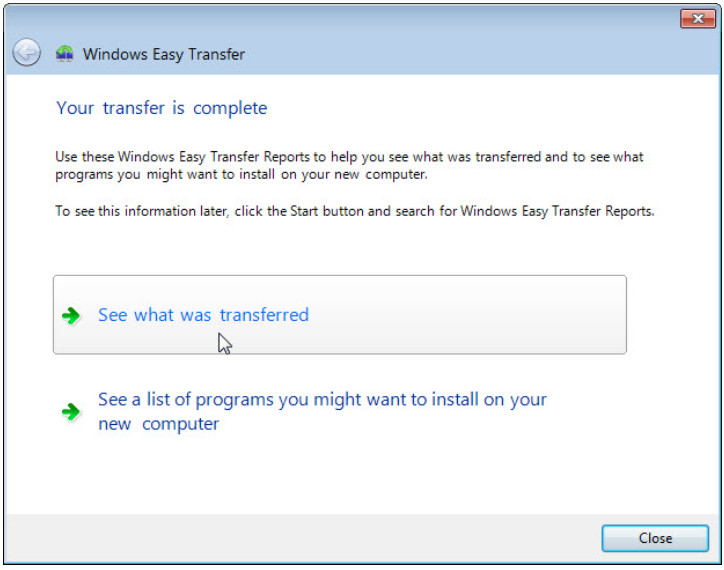
i. Click See what was transferred.
j. Click Details below 1 document.
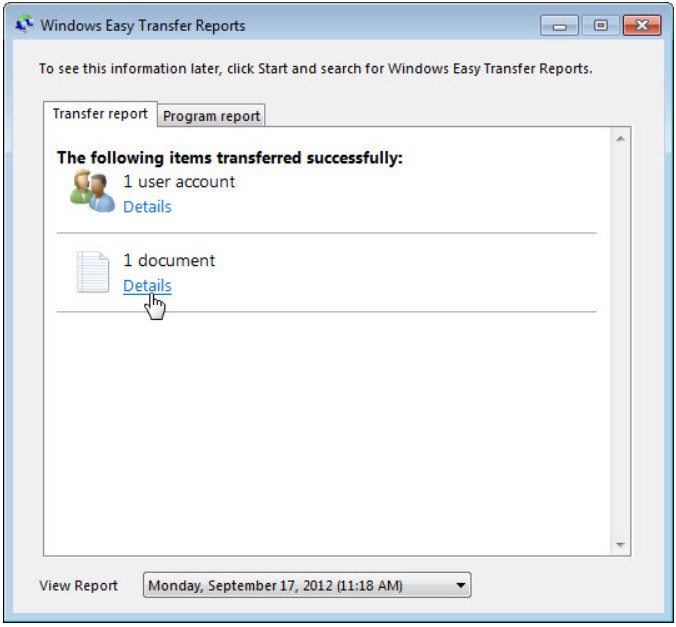
The Documents successfully transferred window opens.
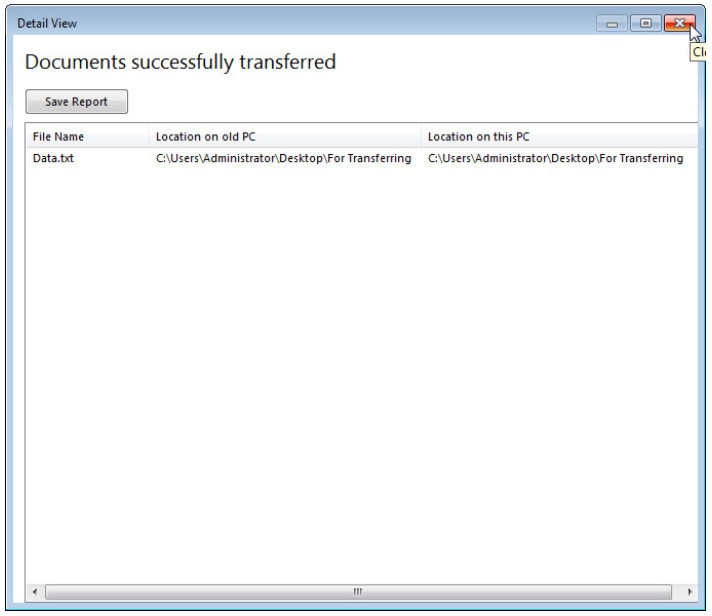
What do you notice about the location of the Data file?
It is located at the exact same place as the original file.
k. Close the Detail View window.
l. Close the Windows Easy Transfer Reports window.
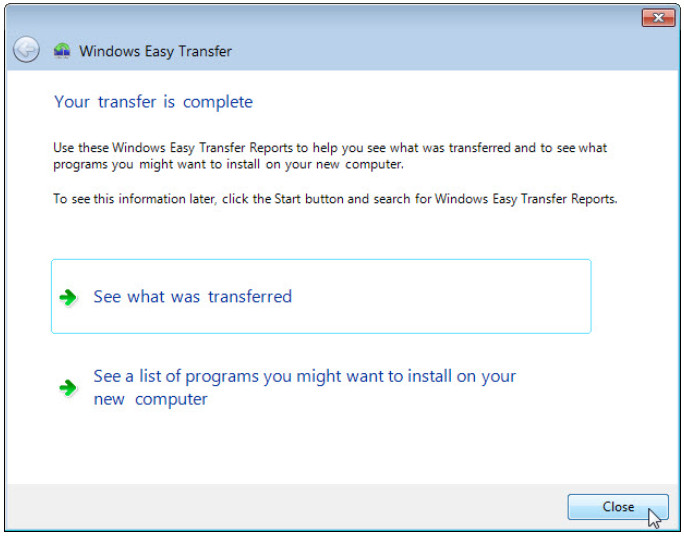
m. When the Window Easy Transfer window opens click Close.
Step 6: Verify the Transfer
a. Navigate to and open the For Transferring folder located on the desktop. Notice the Data file has been transferred.
If advised by the instructor, delete all folders and files created on the desktop and USB flash drive during this lab.
Part 2: Windows Vista
Step 1: Prepare for data migration
a. Log on to the computer.
b. Right-click the desktop and choose New > Folder.
c. Type For Transferring and press Enter to name the folder.
d. Click Start > All Programs > Accessories > Notepad to open Notepad.
e. Type From older PC in Notepad.
f. Click File > Save As..
g. Navigate to Desktop > For Transferring.
h. Type Data in the File Name box and press Enter.
i. Click File > Exit.
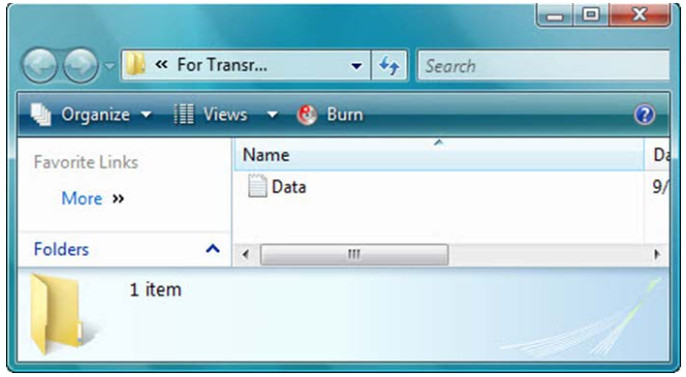
j. You should now have a file named Data in a folder called For Transferring.
Step 2: Prepare the flash drive
a. Connect the USB flash drive to the computer
b. Open the For Transferring folder.
c. Navigate to Computer and open the USB flash drive
d. Create a folder on the USB flash drive and name it Transfer data files.
Step 3: Create the Easy Transfer file
a. Click Start > All Programs > Accessories > System Tools > Windows Easy Transfer. The Windows Easy Transfer window opens.
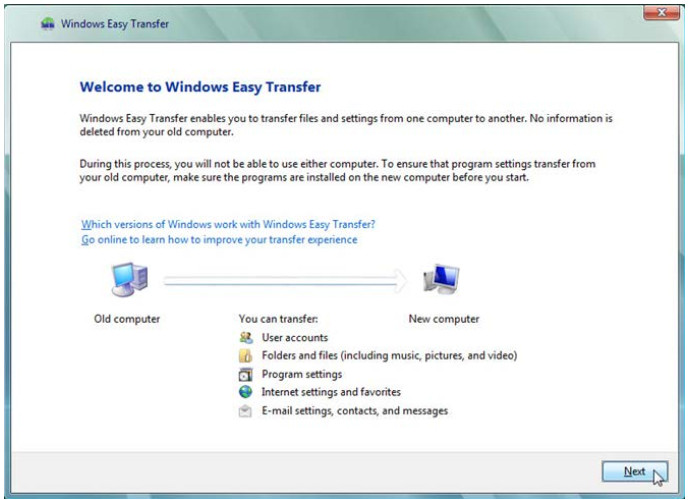
b. Click Next. The Do you want to start a new transfer or continue one in progress? window opens.
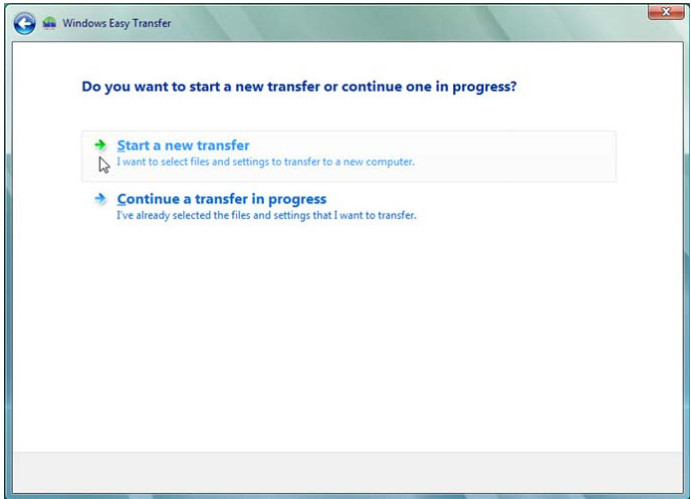
c. Click Start a new transfer. The Which computer are you using now? window opens.
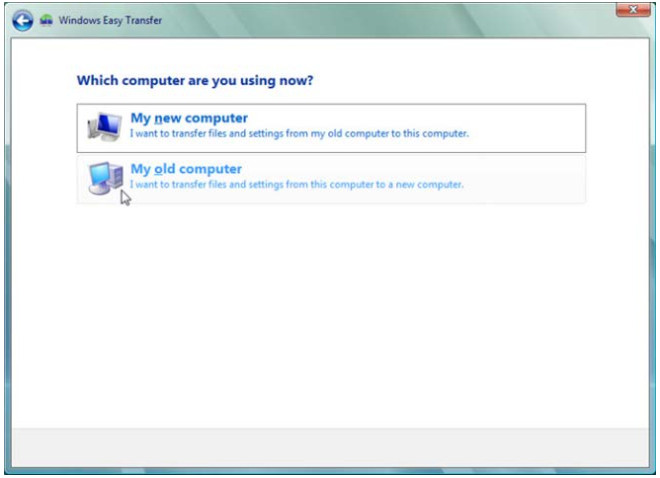
d. Click My old computer. The Choose how to transfer files and settings to your new computer window opens.
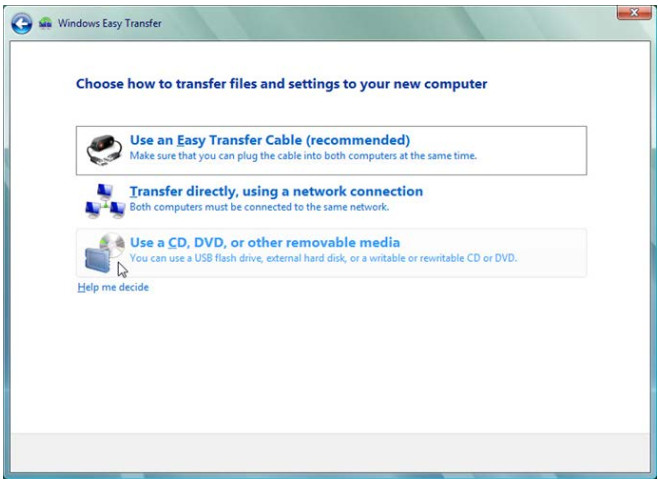
e. Click Use a CD, DVD, or other removable media. The Choose how to transfer files and program settings window opens.
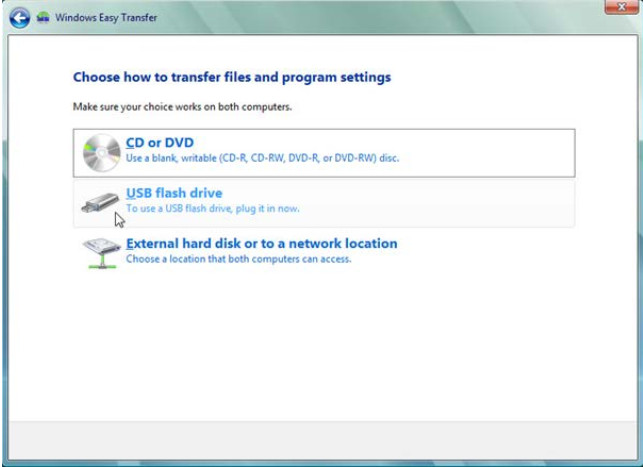
f. Click USB flash drive. The Plug in an empty USB flash drive window opens. Because you are transferring the files back to the same computer, a password is not required.
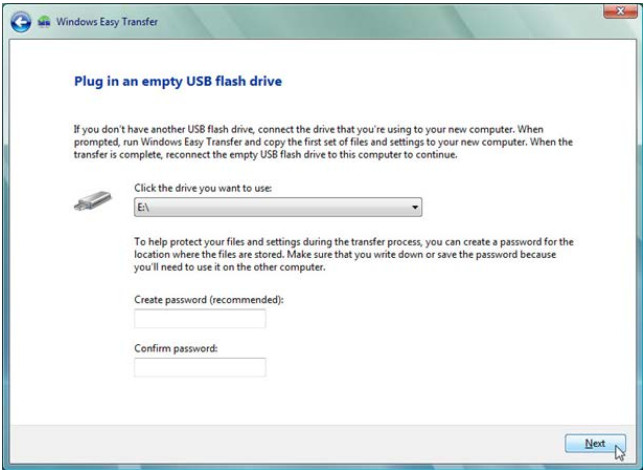
g. Click Next. The What do you want to transfer to your new computer? window opens.
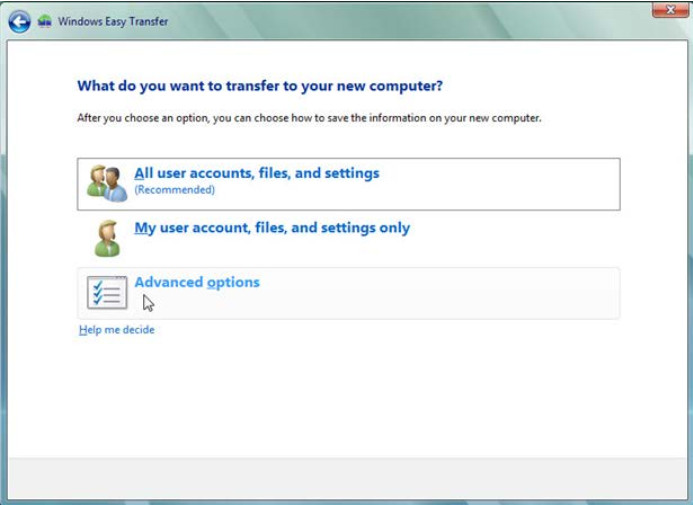
h. Click Advanced options. The Select user accounts, files, and settings to transfer window opens.
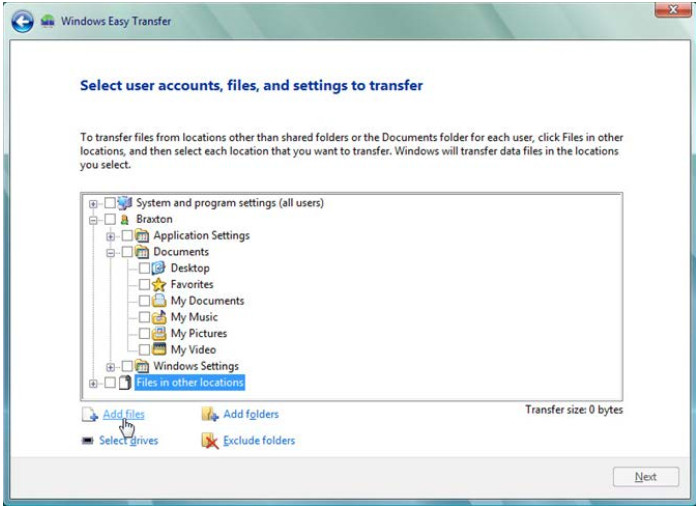
i. Remove the check mark from each box in the window.
j. Click Add files.
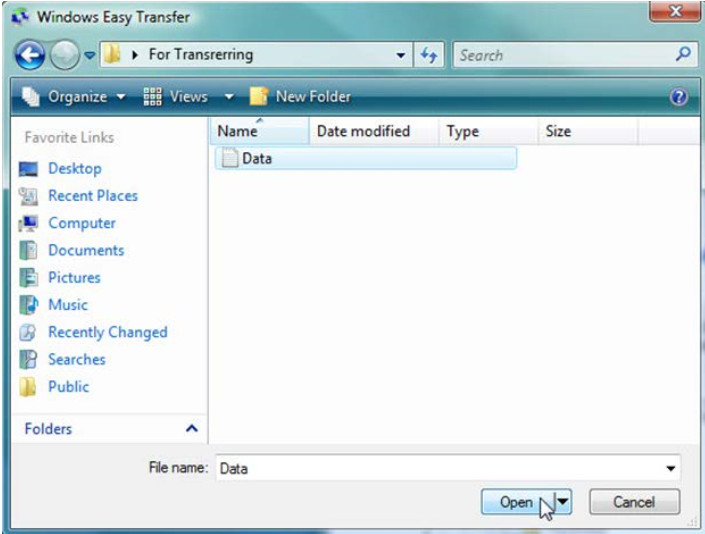
k. Navigate to the For Transferring folder that is on the desktop. This will be the location where files are transferred from.
l. Select the Data file and click Open. The Select user accounts, files, and settings to transfer window opens.
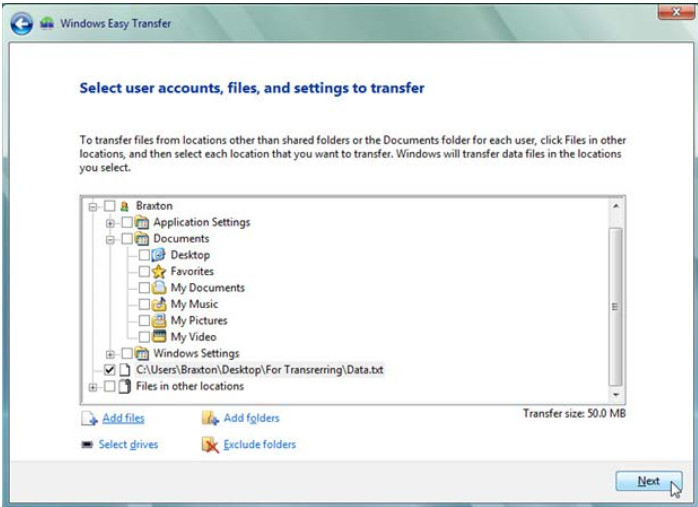
m. Click Next. The You’re ready to transfer files and settings to your new computer window opens.
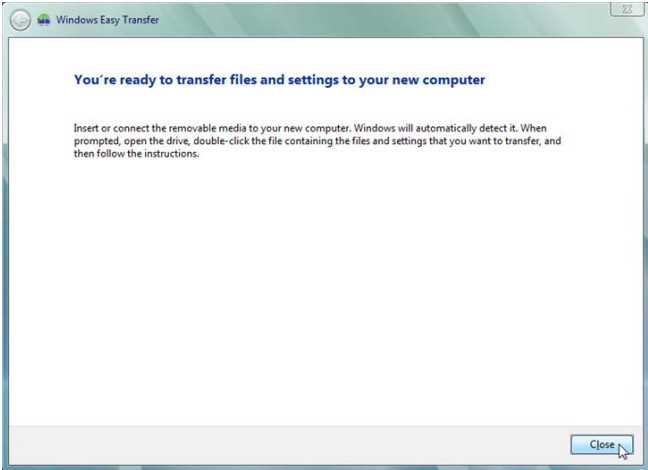
n. Click Close.
Step 4: Delete the original data
a. Locate and delete the Data file in the For Transferring folder that is located on the desktop.
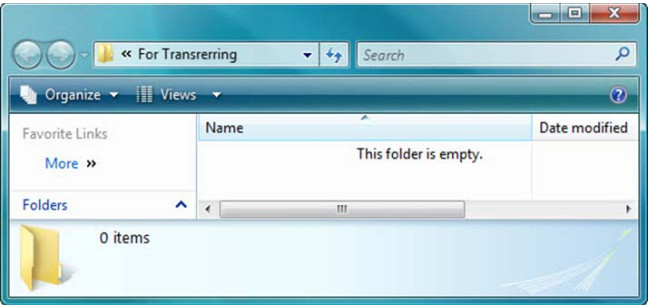
b. Right-click the Recycle Bin > Empty Recycle Bin.
Step 5: Receive the transfer file
a. Click Start > All Programs > Accessories > System Tools > Windows Easy Transfer. The Welcome to Windows Easy Transfer window opens.
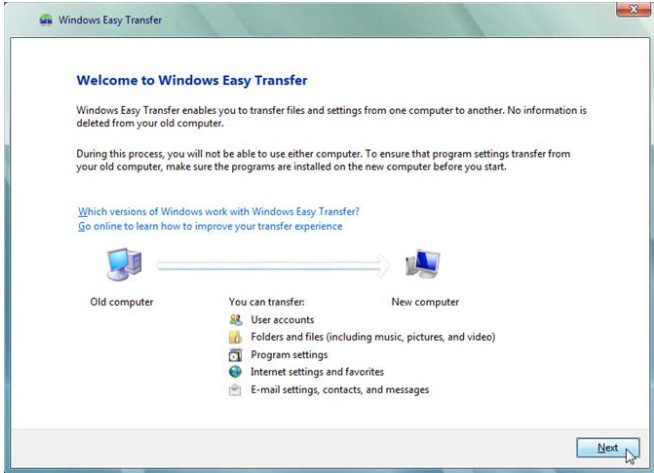
b. Click Next. The Do you want to start a new transfer or continue one in progress? window opens.
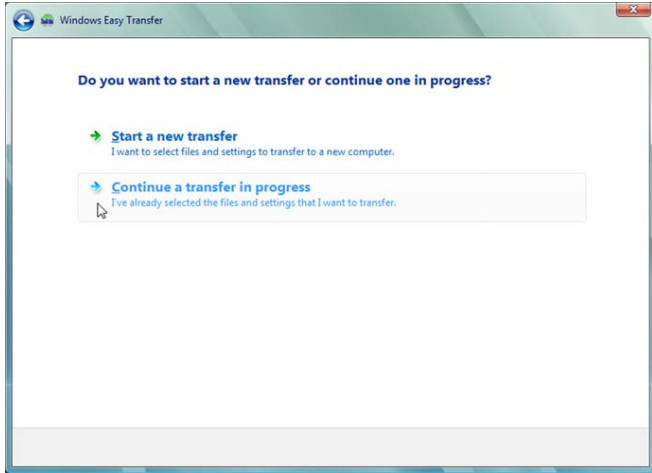
c. Click Continue a transfer in progress. The Are your computers connected to a network? window opens.
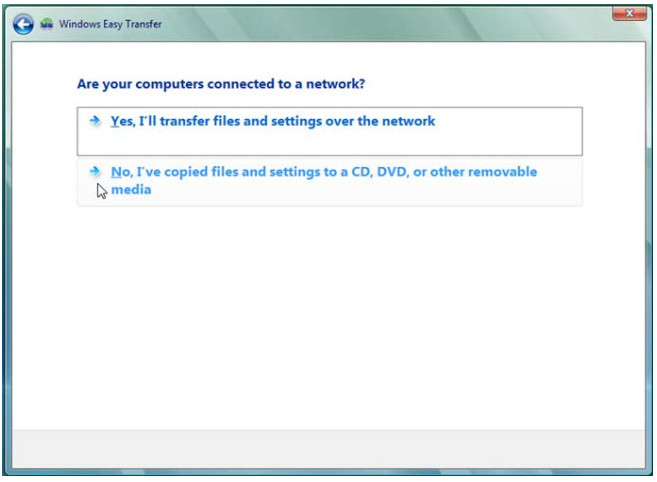
d. Click No, I’ve copied files and settings to a CD, DVD, or other removable media. The Where did you save the files and settings you want to transfer? window opens.
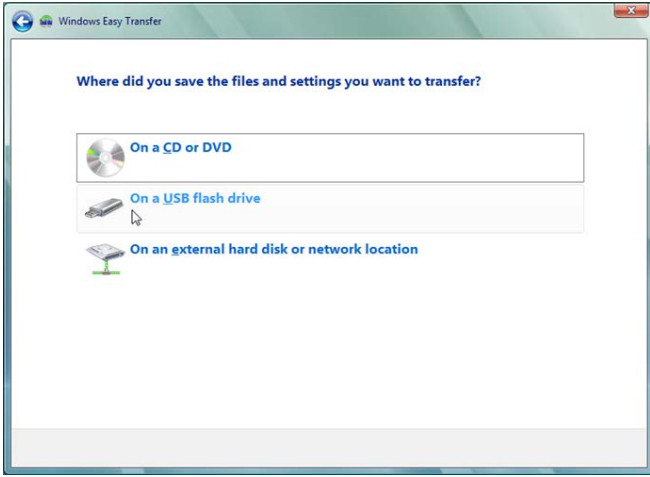
e. Click On a USB flash drive. The Plug in the flash drive window opens.
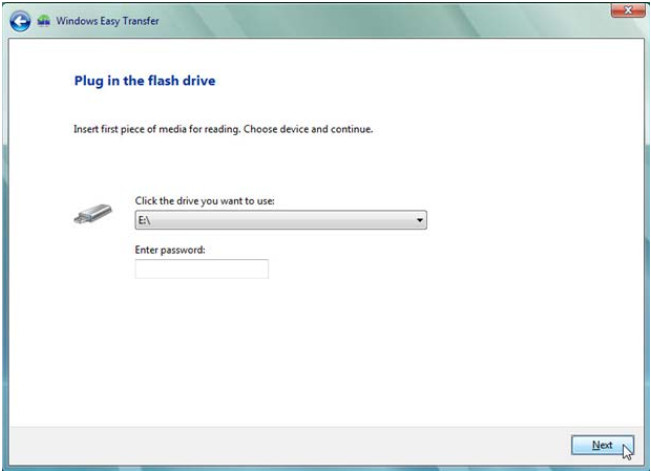
f. Click Next. The Review selected files and settings window opens.
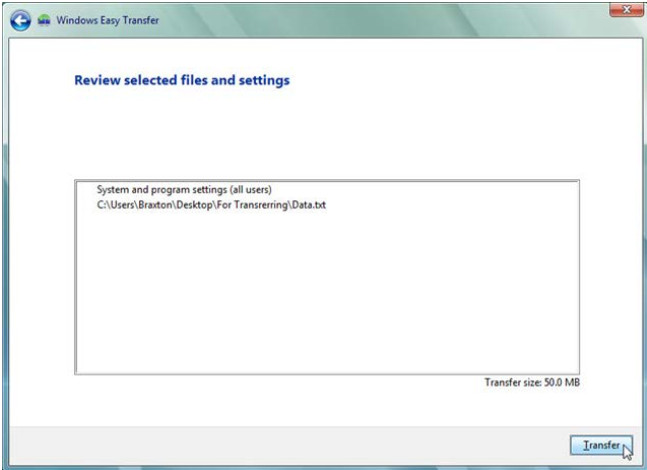
g. Click Transfer. The The transfer is complete window opens.
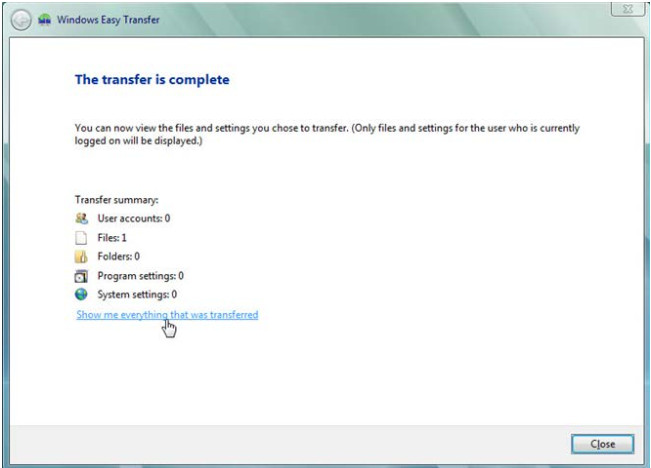
h. Click Show me everything that was transferred. The Windows Easy Transfer Report window opens.
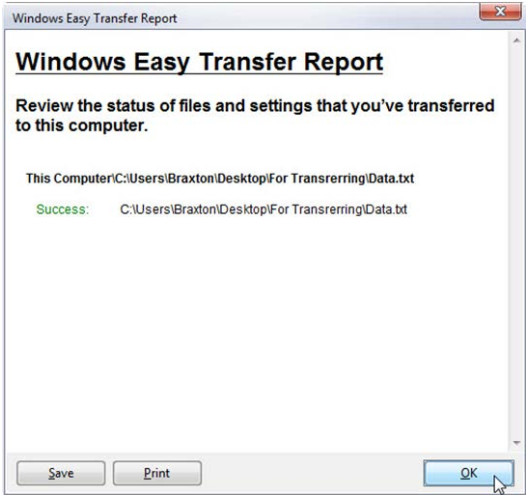
What do you notice about the location of the new Data file?
It is located at the exact same place as the original file.
i. Click OK.
j. Close the Detail View window.
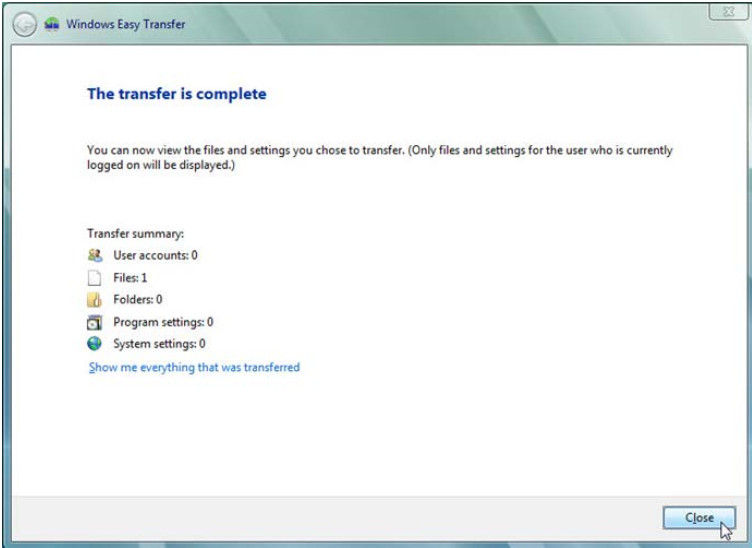
k. When the Window Easy Transfer window opens click Close.
Step 6: Verify the Transfer
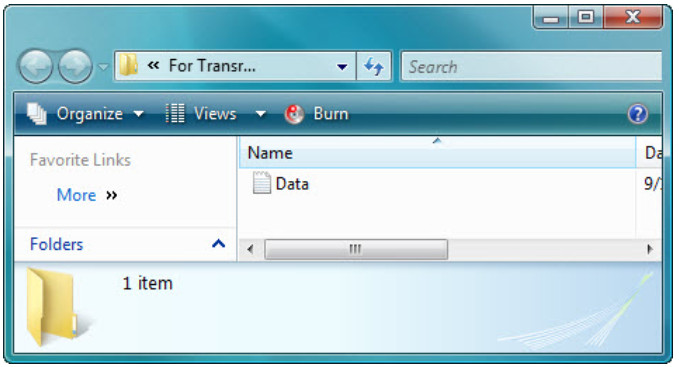
a. Navigate to and open the For Transferring folder located on the desktop. Notice the Data file has been restored.
b. If advised by the instructor, delete all folders and files created on the computer desktop and USB flash drive during this lab.
