Objectives
- Part 1: Capture DNS Traffic
- Part 2: Explore DNS Query Traffic
- Part 3: Explore DNS Response Traffic
Background / Scenario
Wireshark is an open source packet capture and analysis tool. Wireshark gives a detailed breakdown of the network protocol stack. Wireshark allows you to filter traffic for network troubleshooting, investigate security issues, and analyze network protocols. Because Wireshark allows you to view the packet details, it can be used as a reconnaissance tool for an attacker.
In this lab, you will install Wireshark on a Windows system and use Wireshark to filter for DNS packets and view the details of both DNS query and response packets.
Required Resources
- 1 Windows PC with Internet access and Wireshark installed
Part 1: Capture DNS Traffic
Step 1: Download and install Wireshark.
a. Install Wireshark for Windows.
b. Wireshark can be downloaded from www.wireshark.org.
c. Choose the software version you need based on your PC’s architecture and operating system. For instance, if you have a 64-bit PC running Windows, choose Windows Installer (64-bit).
d. After making a selection, the download should start. The location of the downloaded file depends on the browser and operating system that you use. For Windows users, the default location is the Downloads folder.
e. The downloaded file is named Wireshark-win64-x.x.x.exe, where x represents the version number. Double-click the file to start the installation process.
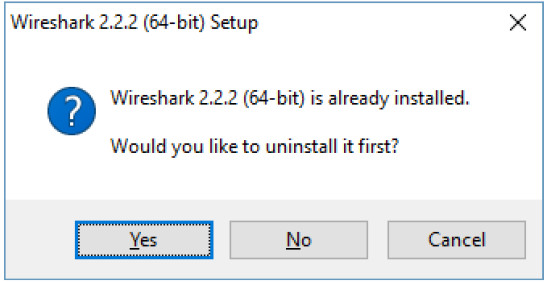
Respond to any security messages that may display on your screen. If you already have a copy of Wireshark on your PC, you will be prompted to uninstall the old version before installing the new version.
It is recommended that you remove the old version of Wireshark prior to installing another version. Click Yes to uninstall the previous version of Wireshark.
f. If this is the first time to install Wireshark, or after you have completed the uninstall process, you will navigate to the Wireshark Setup wizard. Click Next.
g. Continue advancing through the installation process. Click I Agree when the License Agreement window displays.
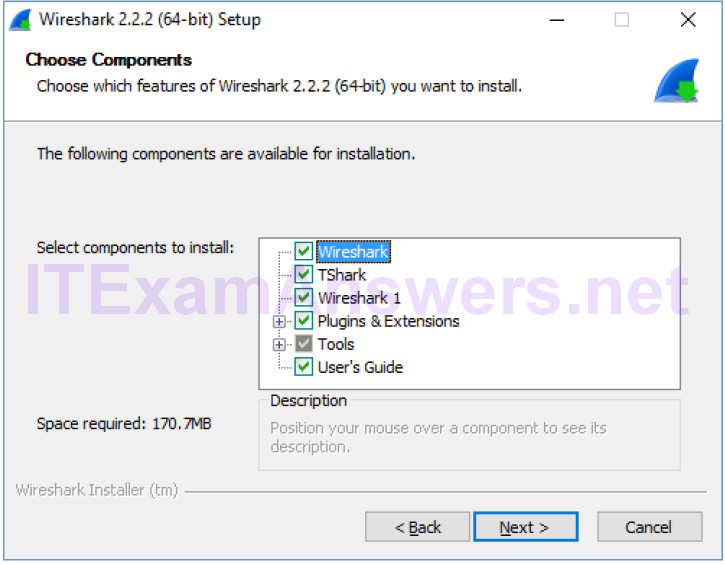
h. Keep the default settings on the Choose Components window and click Next.
i. Choose your desired shortcut options and click Next.
j. You can change the installation location of Wireshark, but unless you have limited disk space, it is recommended that you keep the default location. Click Next to continue.
k. To capture live network data, WinPcap must be installed on your PC. If WinPcap is already installed on your PC, the Install check box will be unchecked. If your installed version of WinPcap is older than the version that comes with Wireshark, it is recommended that you allow the newer version to be installed by clicking the Install WinPcap x.x.x (version number) check box.
Finish the WinPcap Setup Wizard if installing WinPcap and accept the license agreement if necessary.
Click Next to continue.
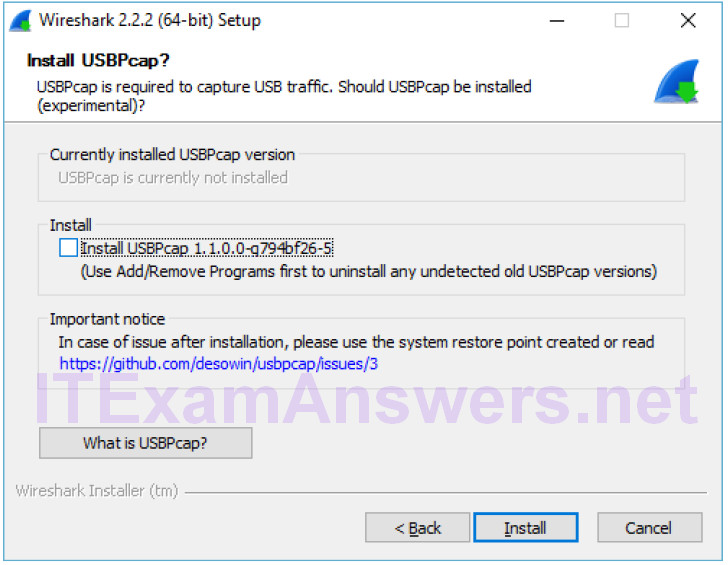
l. Do NOT install USBPcap for normal traffic capture. Do NOT select the checkbox to install USBPcap. USBPcap is experimental, and it could cause USB problems on your PC. Click Install to continue.
m. Wireshark starts installing its files and a separate window displays with the status of the installation. Click Next when the installation is complete.
n. Click Finish to complete the Wireshark install process. Reboot the computer if necessary.
Step 2: Capture DNS traffic.
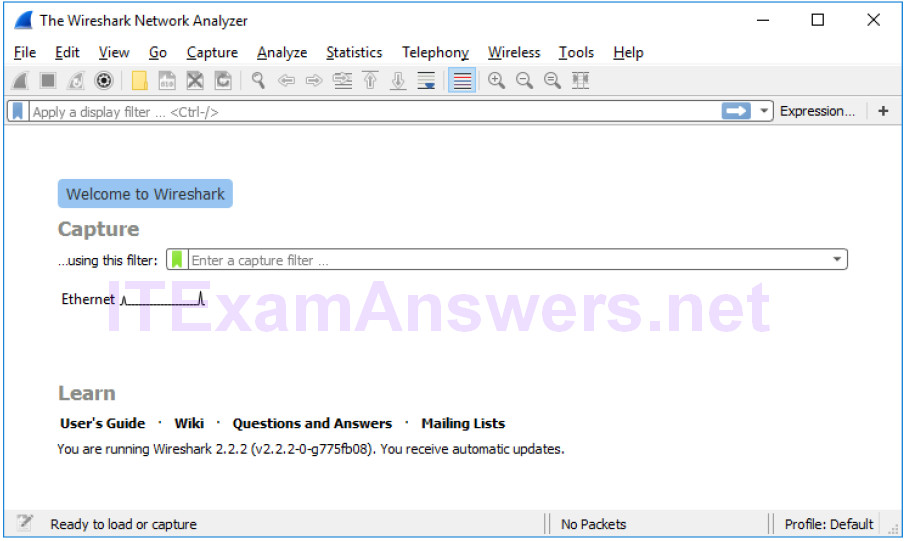
a. Click Start and search for Wireshark. Open Wireshark and start a Wireshark capture by double clicking a network interface with traffic. In this example, Ethernet is the network interface with traffic.
b. Click Start and search for Command Prompt. Open Command Prompt.
c. In the Command Prompt, type ipconfig /flushdns and press Enter to clear the DNS cache.

d. Type nslookup and press Enter to enter the interactive mode.
e. Enter the domain name of a website. The domain name www.cisco.com is used in this example.
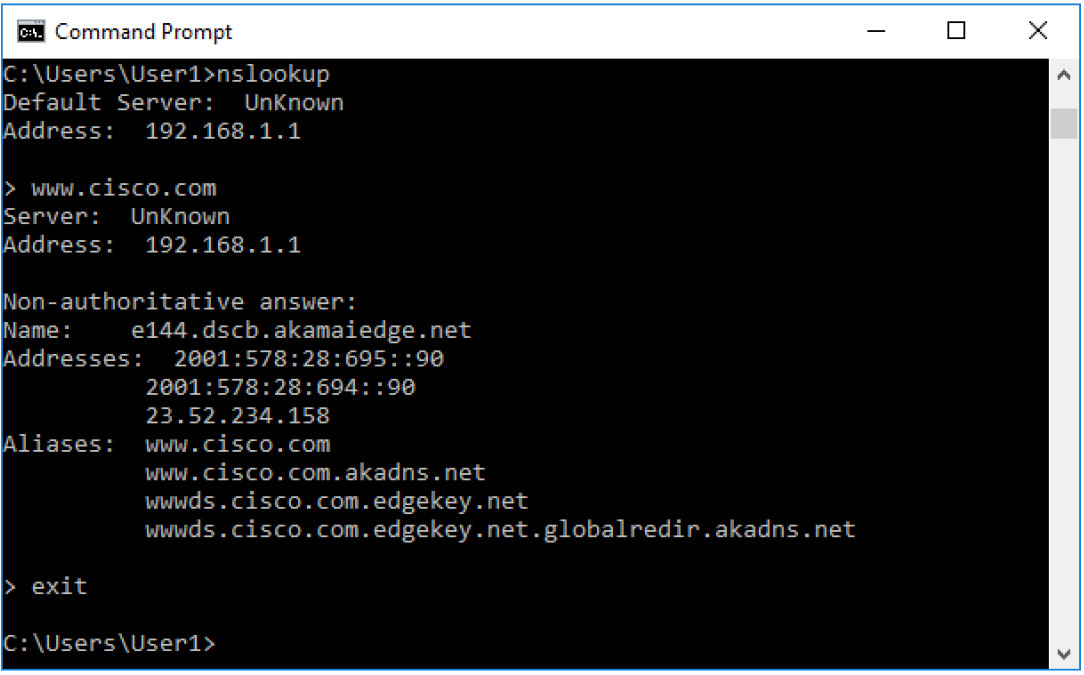
f. Type exit when finished. Close the command prompt.
g. Click Stop capturing packets to stop the Wireshark capture.
Part 2: Explore DNS Query Traffic
a. Observe the traffic captured in the Wireshark Packet List pane. Enter udp.port == 53 in the filter box and click the arrow (or press enter) to display only DNS packets.
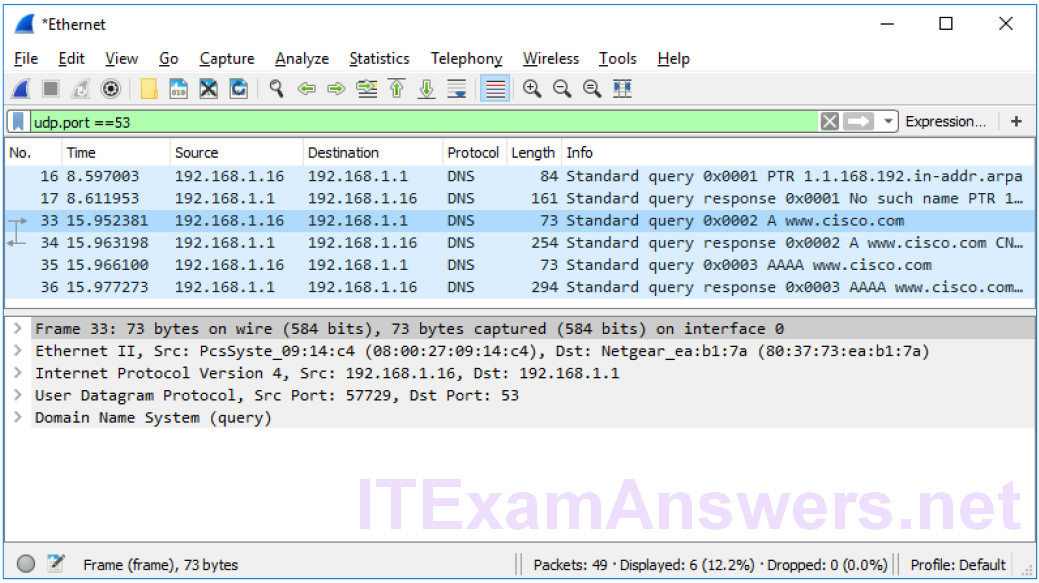
b. Select the DNS packet labeled Standard query 0x0002 A www.cisco.com.
c. In the Packet Details pane, notice this packet has Ethernet II, Internet Protocol Version 4, User Datagram Protocol and Domain Name System (query).
d. Expand Ethernet II to view the details. Observe the source and destination fields.
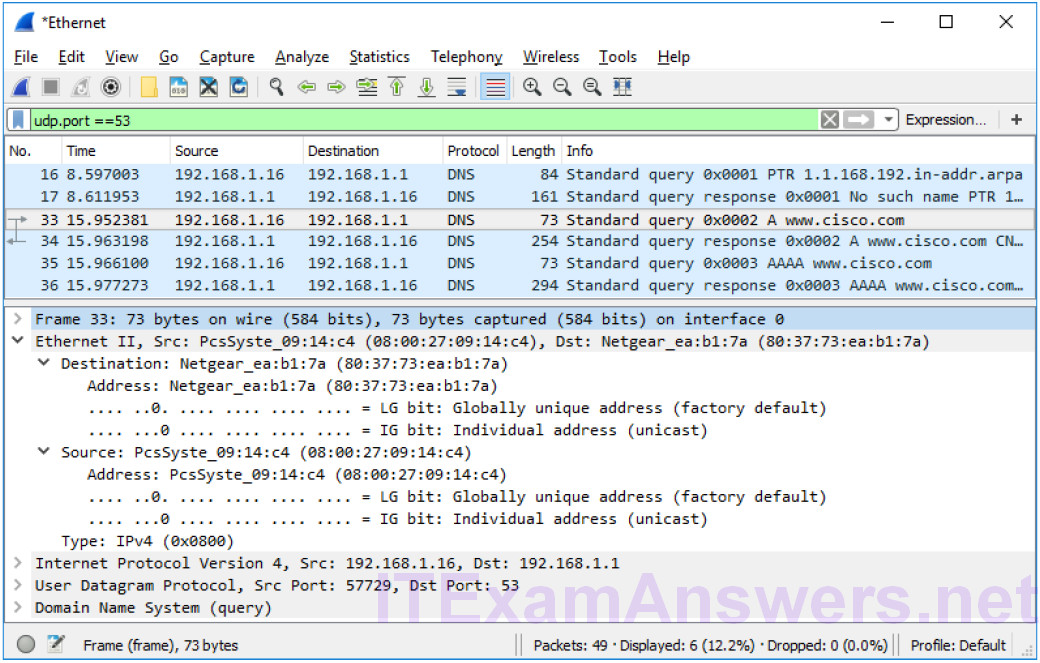
What are the source and destination MAC addresses? Which network interfaces are these MAC addresses associated with?
In this example, the source MAC address is associated with the NIC on the PC and the destination MAC address is associated with the default gateway. If there is a local DNS server, the destination MAC address would be the MAC address of the local DNS server.
e. Expand Internet Protocol Version 4. Observe the source and destination IPv4 addresses.
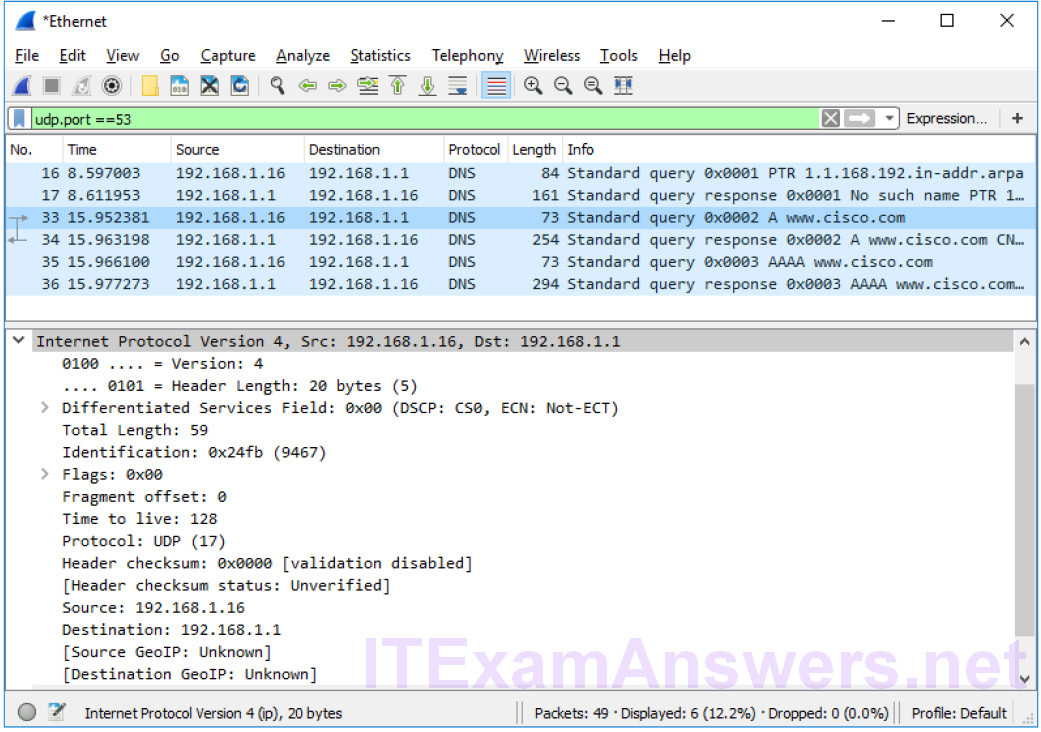
What are the source and destination IP addresses? Which network interfaces are these IP addresses associated with?
In this example, the source IP address is associated with the NIC on the PC and the destination IP address is associated with the default gateway.
f. Expand the User Datagram Protocol. Observe the source and destination ports.
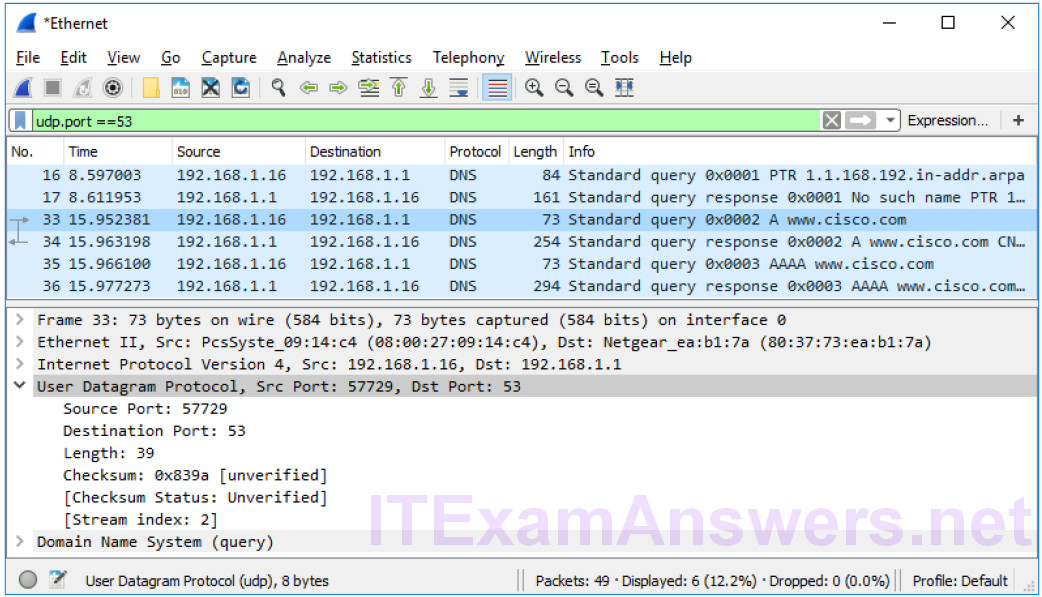
What are the source and destination ports? What is the default DNS port number?
The source port number is 577729 and the destination port is 53, which is the default DNS port number.
g. Open a Command Prompt and enter arp –a and ipconfig /all to record the MAC and IP addresses of the PC.
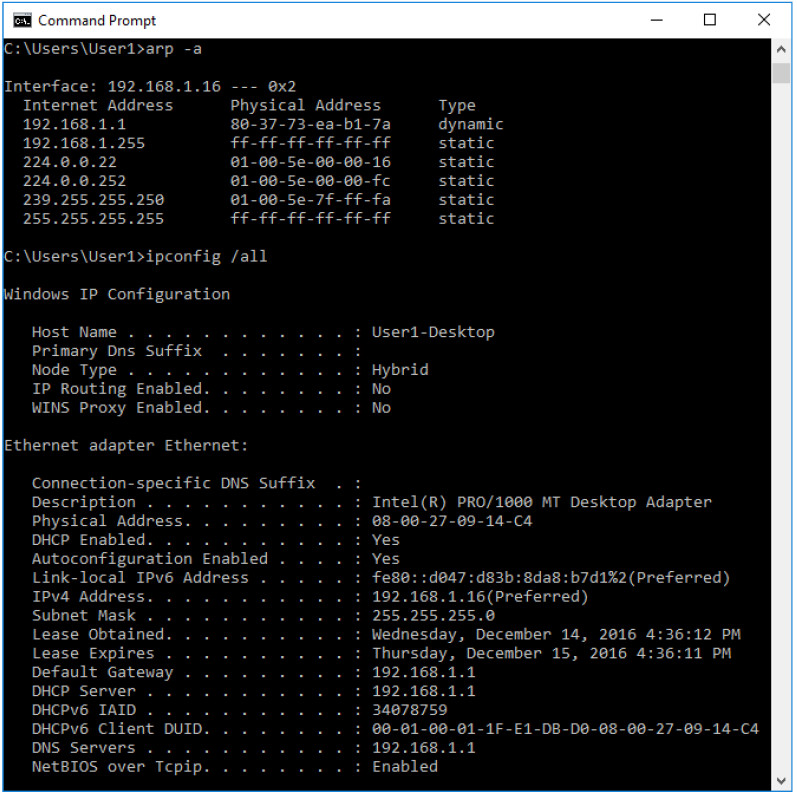
Compare the MAC and IP addresses in the Wireshark results to the results from the ipconfig /all results.
What is your observation?
The IP and MAC addresses captured in the Wireshark results are the same as the addresses listed in ipconfig /all command.
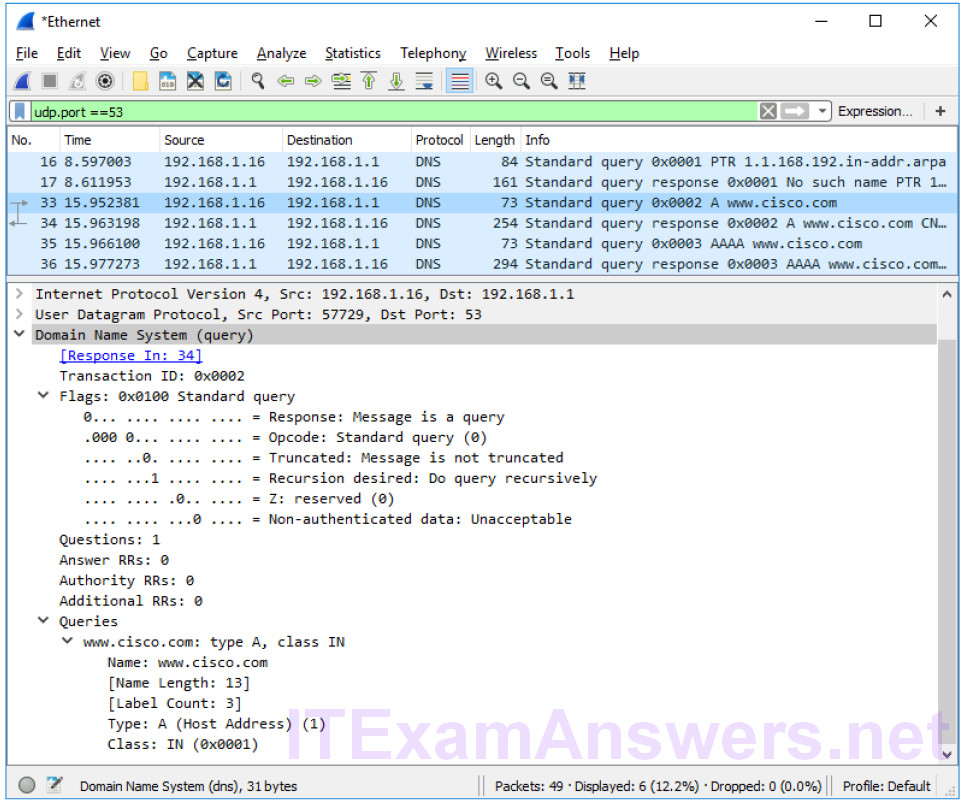
h. Expand Domain Name System (query) in the Packet Details pane. Then expand the Flags and Queries.
i. Observe the results. The flag is set to do the query recursively to query for the IP address to www.cisco.com.
Part 3: Explore DNS Response Traffic
a. Select the corresponding response DNS packet labeled Standard query response 0x000# A www.cisco.com.
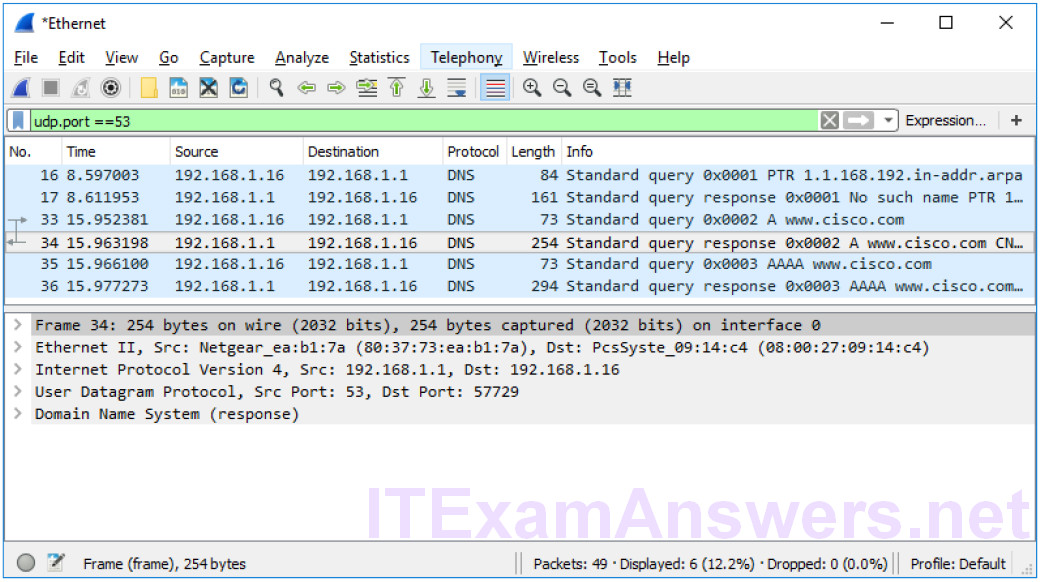
What are the source and destination MAC and IP addresses and port numbers? How do they compare to the addresses in the DNS query packets?
The source IP, MAC address, and port number in the query packet are now destination addresses. The destination IP, MAC address, and port number in the query packet are now source addresses.
b. Expand Domain Name System (response). Then expand the Flags, Queries, and Answers.
c. Observe the results. Can the DNS server do recursive queries?
Yes, the DNS can handle recursive queries.
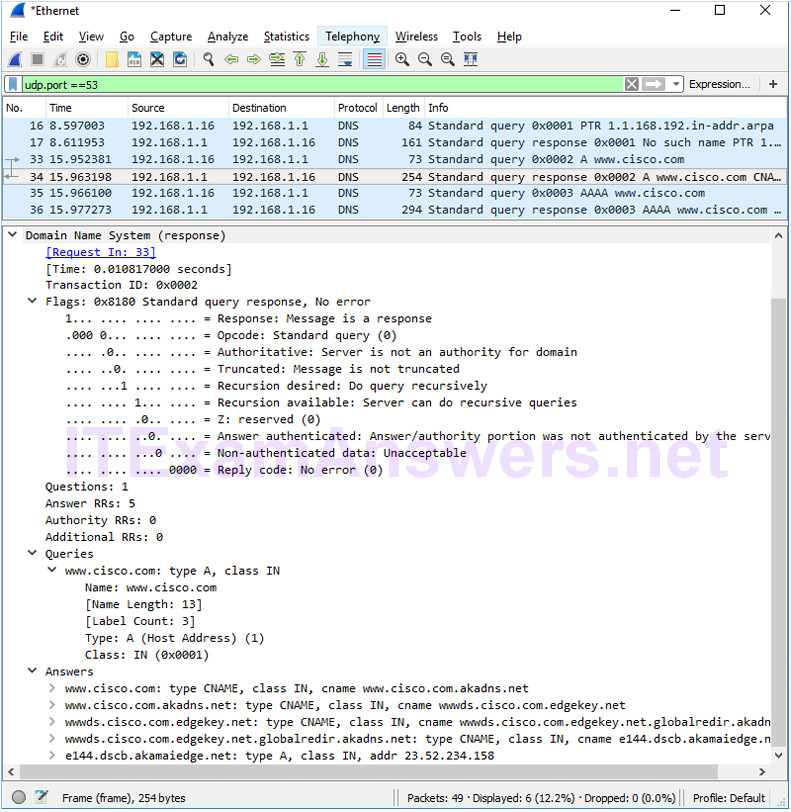
d. Observe the CNAME and A records in the Answers details. How do the results compare to nslookup results?
The results in the Wireshark should be the same as the results from nslookup in the Command Prompt.
Reflection
1. From the Wireshark results, what else can you learn about the network when you remove the filter?
Without the filters, the results display other packets, such as DHCP and ARP. From these packets and the information contained within these packets, you can learn about other devices and their functions within the LAN.
2. How can an attacker use Wireshark to compromise your network security?
An attacker on the LAN can use Wireshark to observe the network traffic and can get sensitive information in the packet details if the traffic is not encrypted.
