Packet Tracer – Manage and Configure your Network using a Network Controller (Instructor Version)
Topology
Objectives
In this activity, you will set up a network controller to monitor a configured network via the graphical user interface.
- Part 1: Deploy a Network Controller
- Part 2: Device Discovery
- Part 3: Add a New Network Device to the Office Network
Required Resources
- Latest Packet Tracer version
Instructions
Part 1: Deploy a Network Controller
In this part, you will add a network controller to monitor the Office network.
Step 1: Connect a Network Controller to Office-SW1.
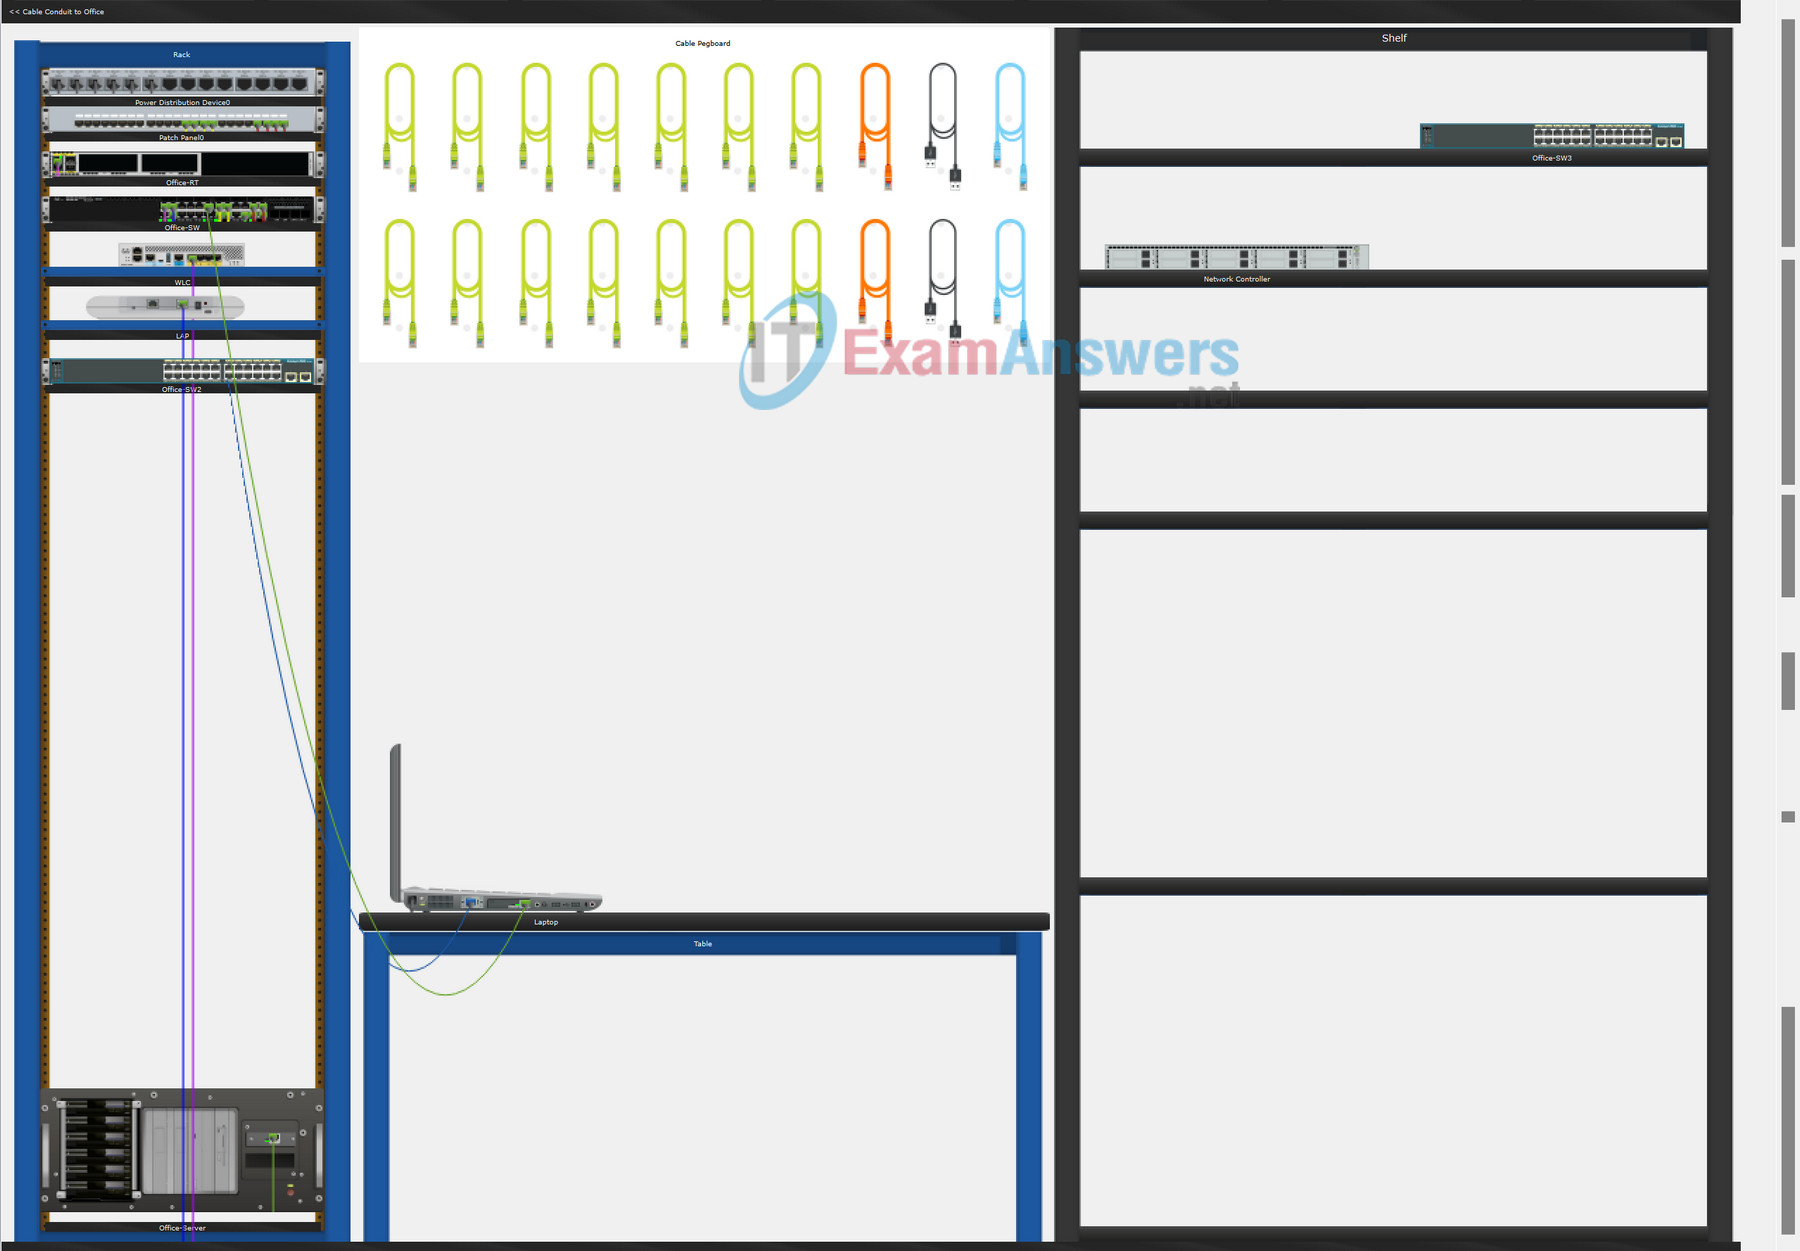
a. In the Physical Mode, navigate, if necessary, to the simulated Wiring Closet (Equipment Cabinet) in the Office.
b. A new Network Controller is located on the Shelf for your use. Move the Network Controller from the Shelf to the Rack.
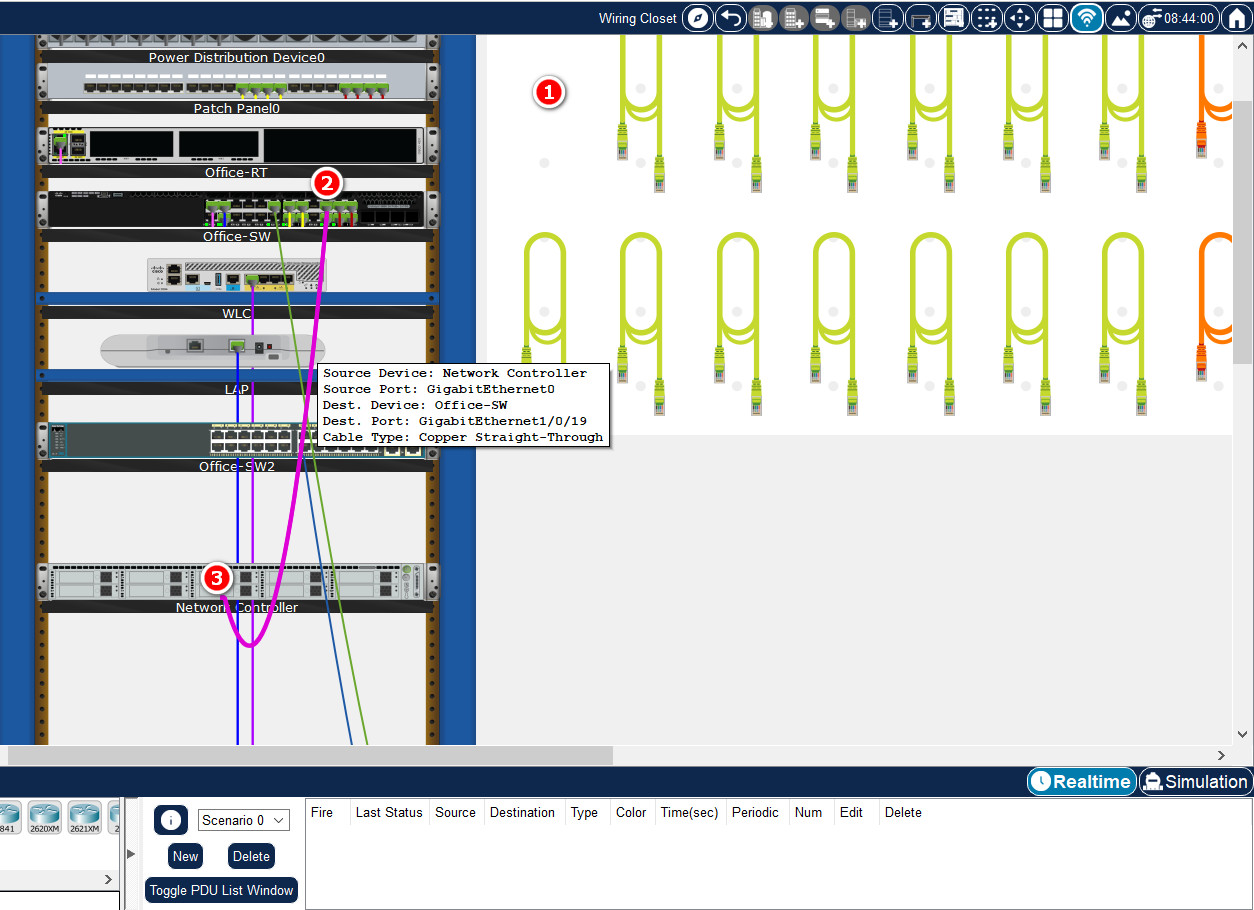
c. Connect the GigabitEthernet0 port on the Network Controller to the GigabitEthernet 1/0/19 port on Office-SW with a Copper Straight-Through cable.
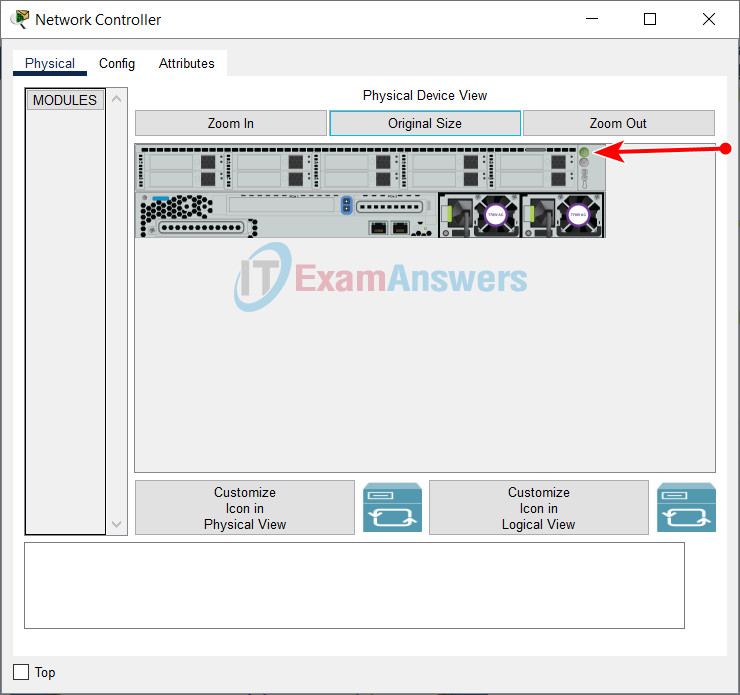
d. Click the newly added Network Controller.
e. On the Physical tab, click the power button to turn on the Network Controller.
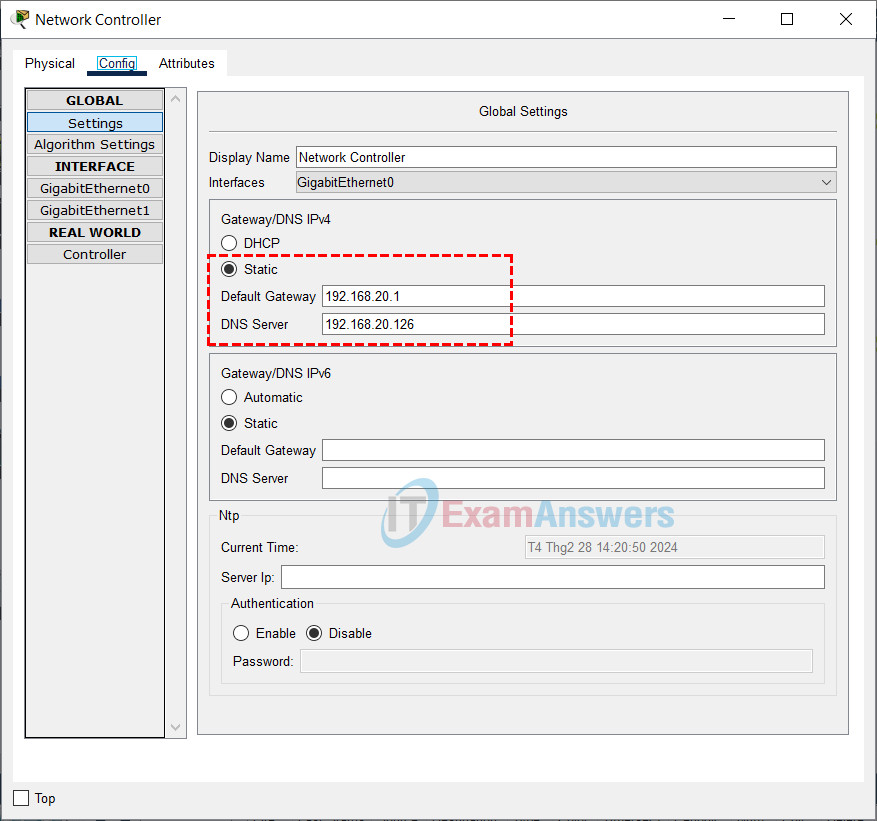
f. In the Config Window Global Settings, enter 192.168.20.1 as the IPv4 default gateway and 192.168.20.126 for the DNS Server.
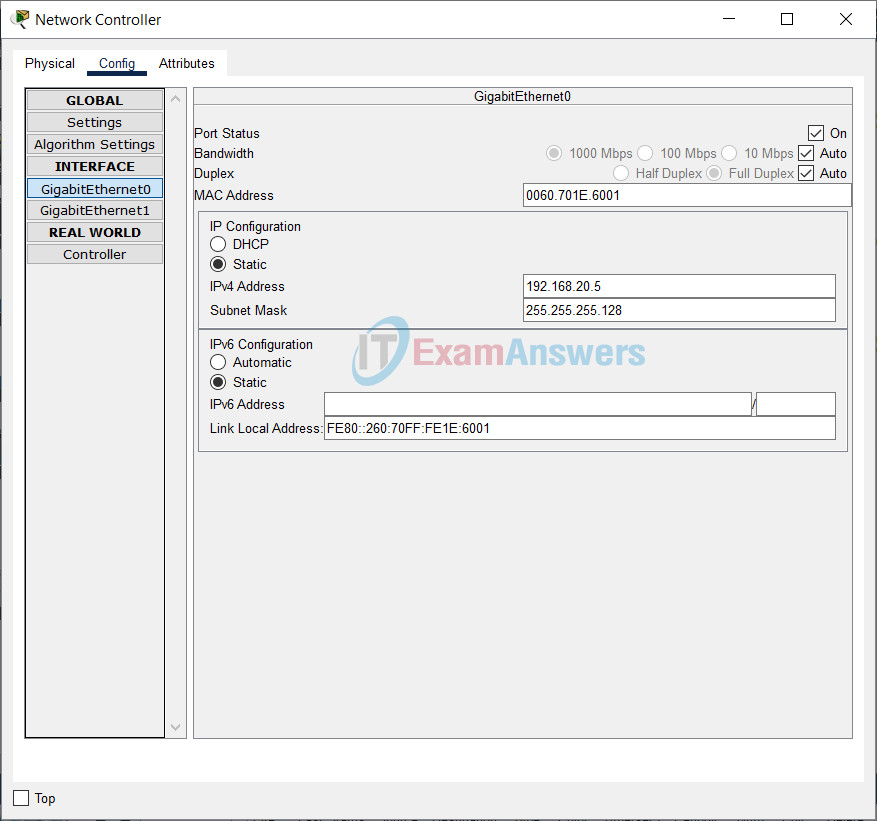
g. In the left pane, click GigabitEthernet0. For the IPv4 Configuration, verify Static is selected. Enter 192.168.20.5 for IPv4 address and 255.255.255.128 for the subnet mask.
Step 2: Verify connectivity.
a. From Laptop in the Wiring Closet, ping the interface of the Network Controller.
b. Click Laptop and select Desktop > Command Prompt.
c. At the prompt, enter ping 192.168.20.5. The pings should be successful.
C:\> ping 192.168.20.5

Pinging 192.168.20.5 with 32 bytes of data:

Reply from 192.168.20.5: bytes=32 time<1ms TTL=128
Reply from 192.168.20.5: bytes=32 time<1ms TTL=128
Reply from 192.168.20.5: bytes=32 time<1ms TTL=128
Reply from 192.168.20.5: bytes=32 time<1ms TTL=128

Ping statistics for 192.168.20.5:
Packets: Sent = 4, Received = 4, Lost = 0 (0% loss),
Approximate round trip times in milli-seconds:
Minimum = 0ms, Maximum = 0ms, Average = 0ms
If the pings are not successful, verify the IP addressing information has been entered correctly on the interface of the Network Controller.
Part 2: Device Discovery
In this part, you will configure a process on the network controller that will discover devices on the Office network.
Step 1: Access the Network Controller via the GUI.
a. From Laptop, open a web browser (click Desktop > Web Browser) and navigate to 192.168.20.5.
b. At the initial login screen, register a new user. Enter admin as the username and Cisco123 as the password. Click Setup to continue.
c. Enter the credentials that you have just created to login as the new user.
d. After you have logged in, you will be presented with the Dashboard view. Maximize the browser window to see the full dashboard.
Step 2: Create the Credentials list.
For the controller to discover devices on the network, it must know the credentials to use to access the devices. You must create a credentials list that will enable the controller to access the devices. Note that these credentials were configured previously on these devices.
a. Click Dashboard > Provisioning > CREDENTIALS to add a new credentials list for discovering the devices on the network.
b. Click + CREDENTIAL.
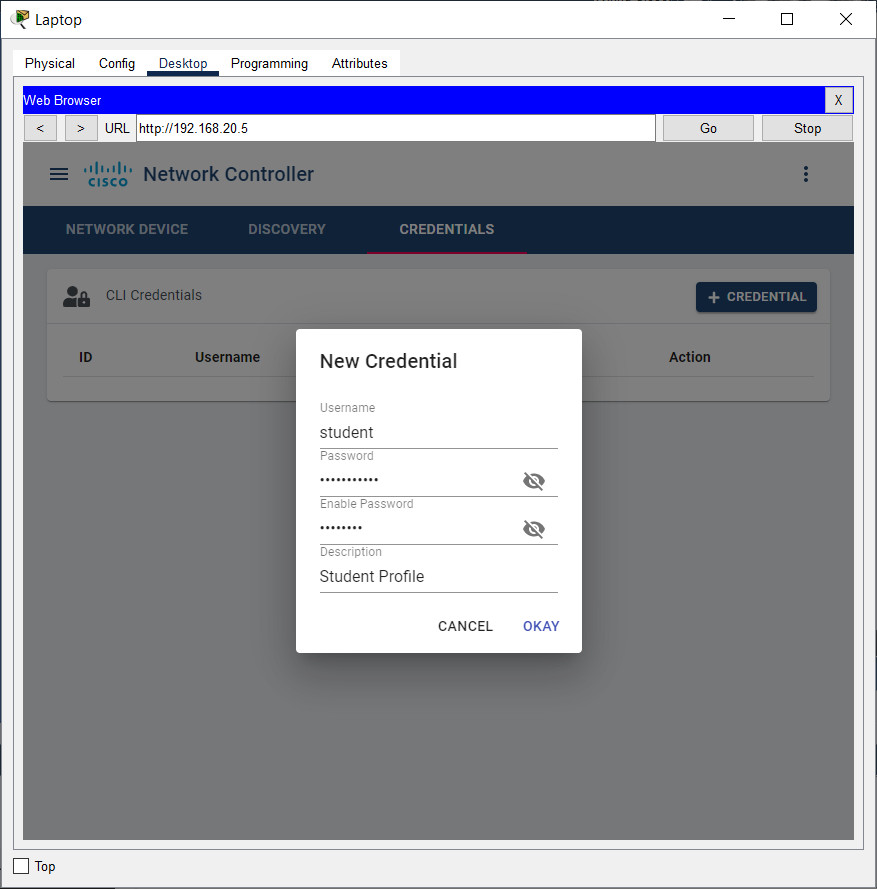
c. In the New Credential window, enter student as the Username, StudentPass as the password, and Cisco123 as the Enable Password. For the Description, enter Student Profile. The Description will be needed to create the Discovery Process. Click OKAY to continue.
Step 3: Create a Discovery Process.
a. Click the Dashboard Menu, click Provisioning > DISCOVERY to discover devices on the local network.
b. Click + DISCOVERY.
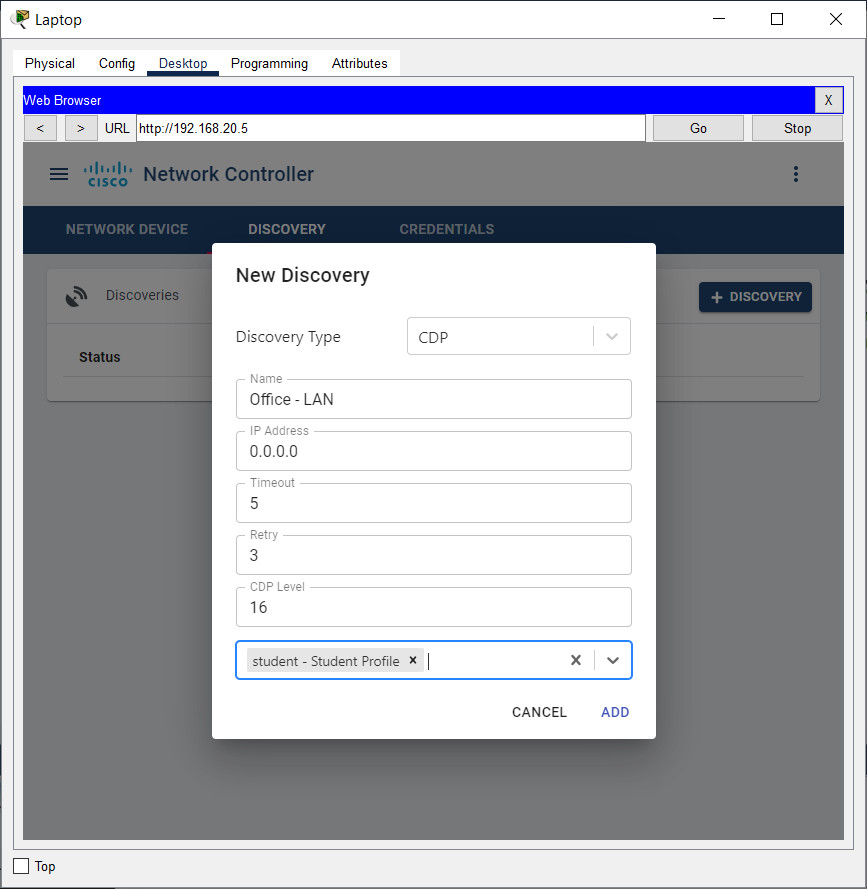
c. In the New Discovery window, use CDP as the Discovery Type. Enter Office – LAN as the name of this process. Enter 0.0.0.0 as the IP address so the controller will discover all the IP addresses on the local network. Select student – Student Profile as the CLI Credential List. Leave all other values as the default. Click ADD to continue.
d. It will take a few minutes for the discovery process to finish.
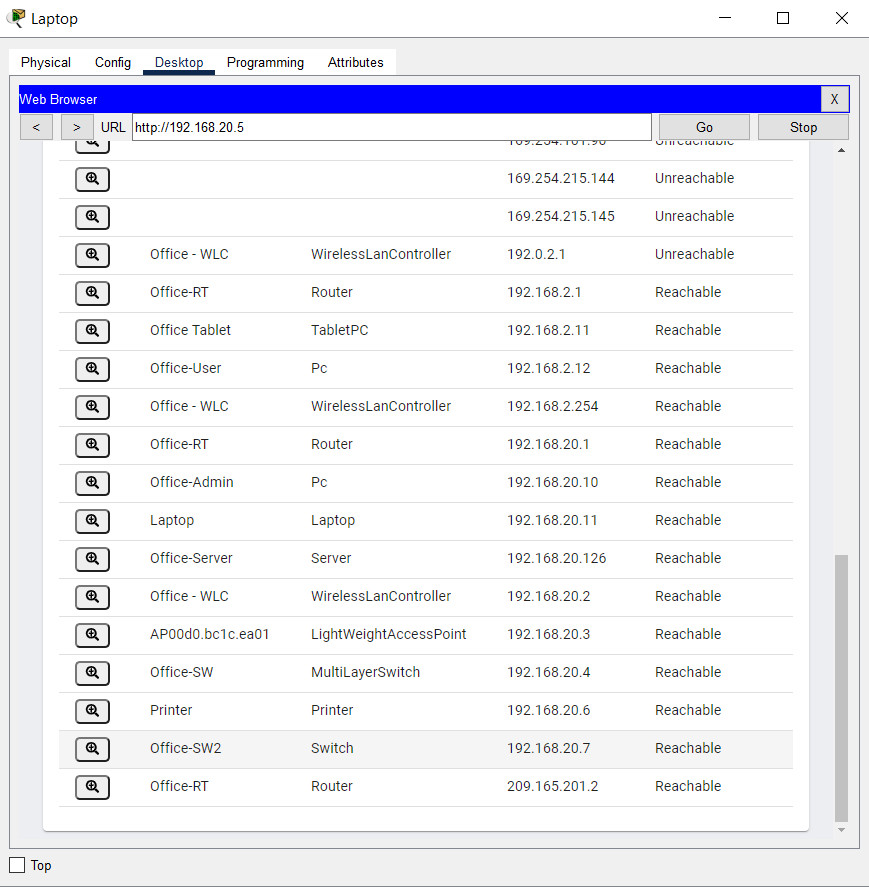
e. Click Office – LAN in the Discoveries list to see all of the discovered devices. Float your mouse over the devices in the equipment rack and locate them in the list of discovered devices.
Why do some devices have multiple entries in the list of Discovered Devices?
Because these devices have multiple interfaces that have been assigned IP addresses.
f. Navigate to the Dashboard to see all the conditions of the local network. Click the gear icon in each section of the interface to see relevant details.
g. Close the web browser. Leave the Laptop window open for the next part.
Part 3: Add a New Network Device to the Office Network
In this part, you will add a new switch to the Office network and observe the changes on the Dashboard of the Network Controller.
Step 1: Deploy a new switch on the network.
a. Connect the GigabitEthernet 0/1 port on Office-SW2 to GigabitEthernet 1/0/5 on Office-SW using a Copper Straight-Through cable.
b. Click Laptop. Click Desktop > Terminal. Click OK accept the defaults and access the CLI of Office-SW2.
c. Press Enter. Copy and paste the following commands into Office-SW2. These commands configure the Office-SW2 switch to operate on the network.
enable
configure terminal
hostname Office-SW2
interface vlan 20
ip address 192.168.20.7 255.255.255.128
no shut
enable secret Cisco123
username student privilege 1 password StudentPass
line vty 0 4
login local
interface range g0/1-2
switchport mode trunk
switchport trunk native vlan 20
interface range f0/1-24
switchport mode access
switchport access vlan 2
vlan 2
name UserNetwork
vlan 20
name Management
end
copy run start
Step 2: Review the network via the Network Controller.
a. Log into the Network Controller via the web browser.
b. Click Dashboard Menu > Provisioning > DISCOVERY.
c. Open the list of devices on the Office – LAN that have been discovered by the controller. Verify that Office-SW2 is not in the list.
d. In the Office Lan Discovery, click START to start the discovery process manually. It will take a few minutes for the discovery process to finish.
e. Click the Office LAN to see all the discovered devices or navigate to the Dashboard to see all the conditions of the local network. Verify that the Office-SW2 switch is now present in the list of discovered devices.
