In Packet Tracer, to access the command line interface (CLI) of a Switch or Router, you can use one of the following two ways:
- The CLI tab
- Console port
The CLI tab
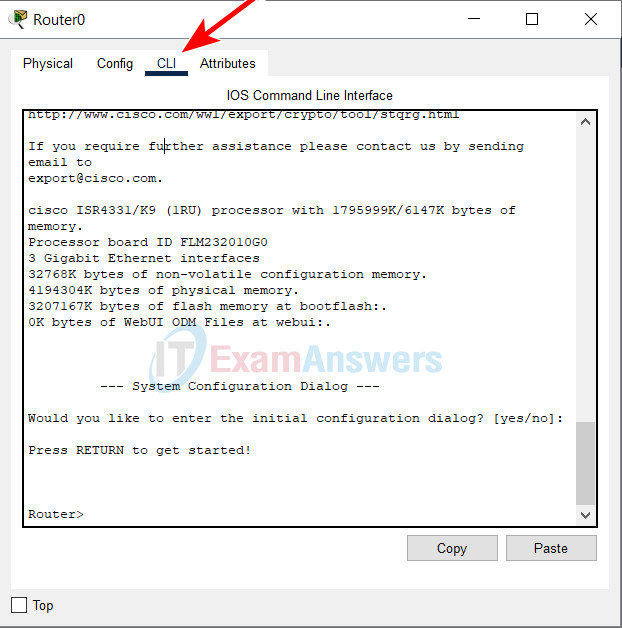
This is the simplest way to access the Command Line Interface (CLI) of a Switch/Router.
Click on the device, go to the “CLI” tab, and you’ll be presented with a command-line interface (CLI).
Console port
Console connections are made between a laptop or PC and the networking device using a cable designed to provide a direct cable connection. In this Packet Tracer activity, the cable is identified as Console and is shown as a light blue cable.
Follow the steps to connect PC to Switch uses a console cable
1. Add a PC or a Laptop to the workspace (If the lab already has a PC, there is no need to add another)
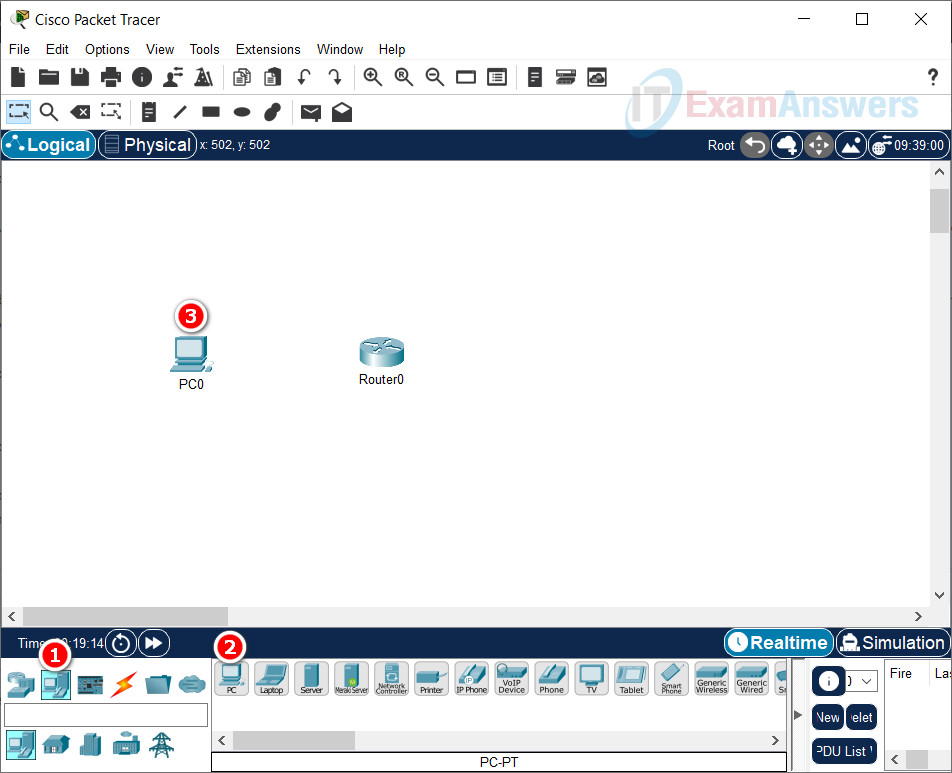
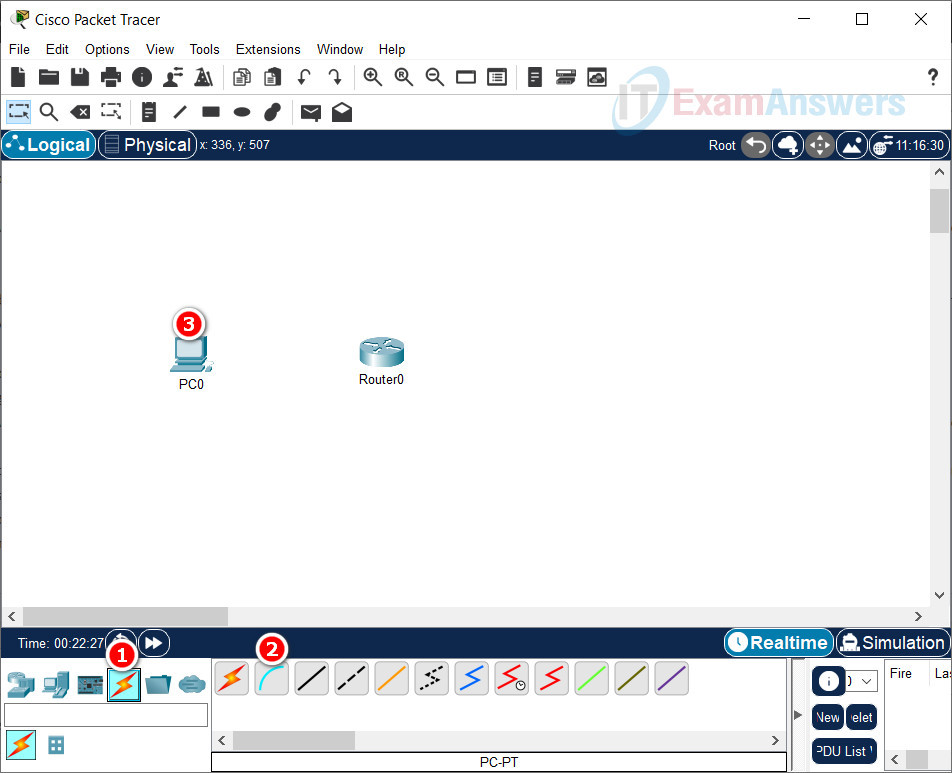
2. Click the Connections icon, select the light blue Console cable
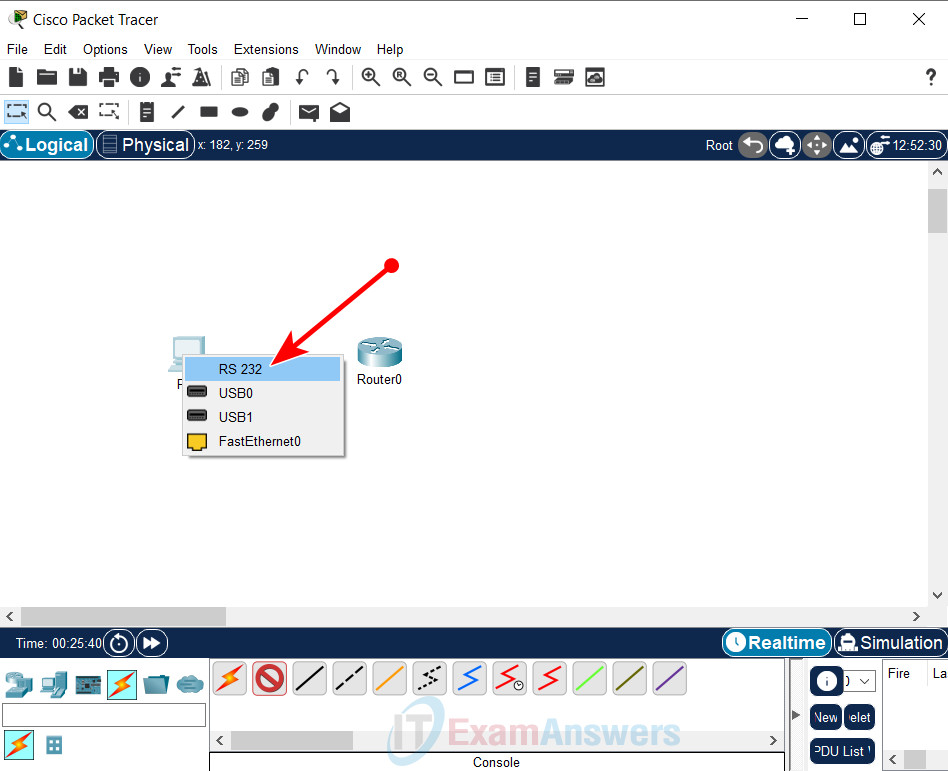
3. Click PC. A window displays an option for an RS-232 connection.
4. Drag the other end of the console connection to the S1 switch and click the switch to bring up the connection list. Select the Console port to complete the connection.
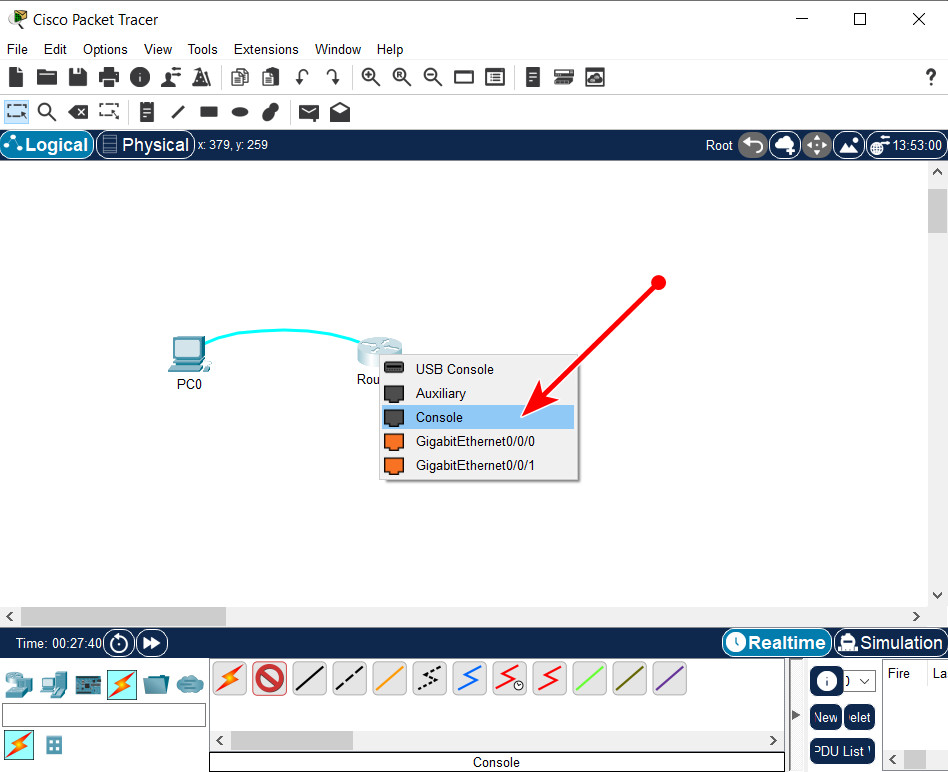
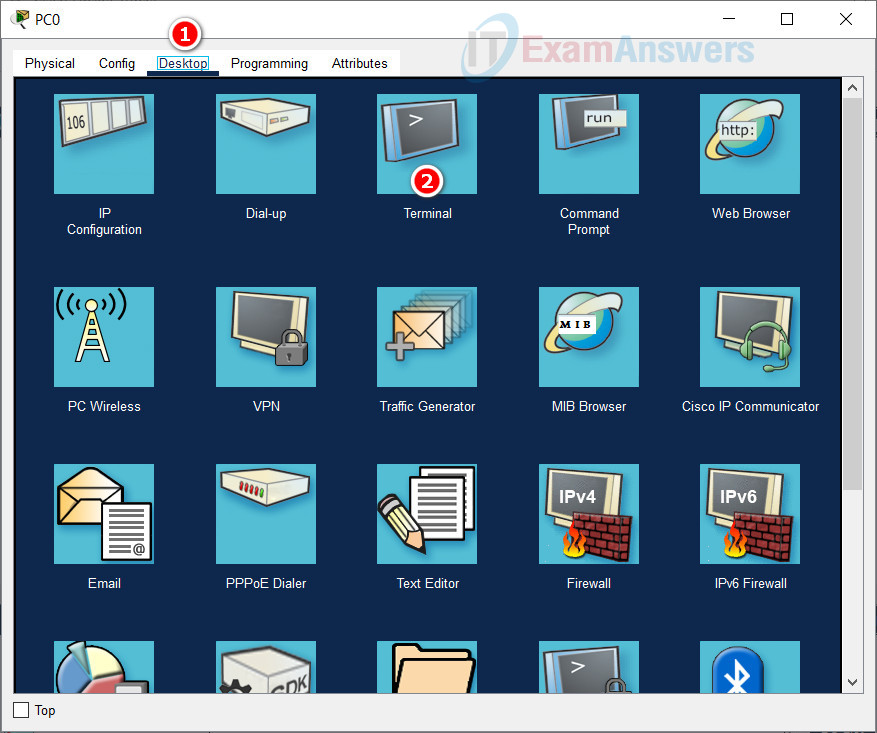
5. Click the PC. Click the Desktop tab. Open the Terminal application.
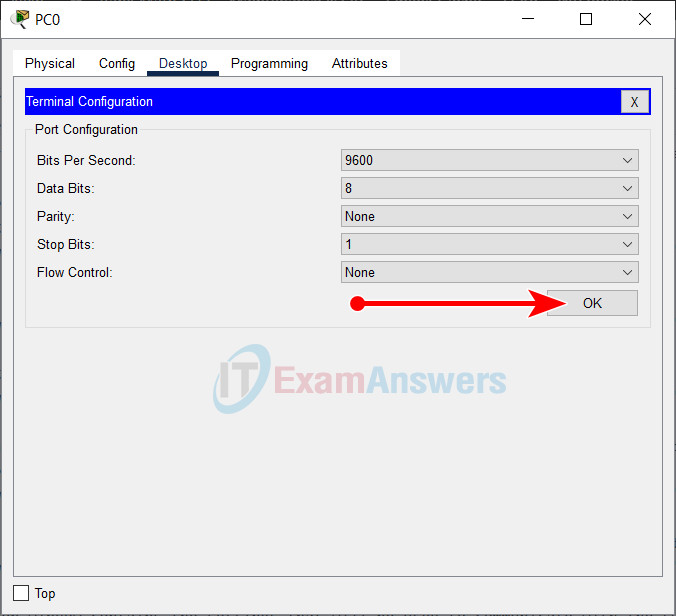
6. The Terminal Configuration window contains the settings that will be used to communicate with the switch. Accept the defaults and click OK.
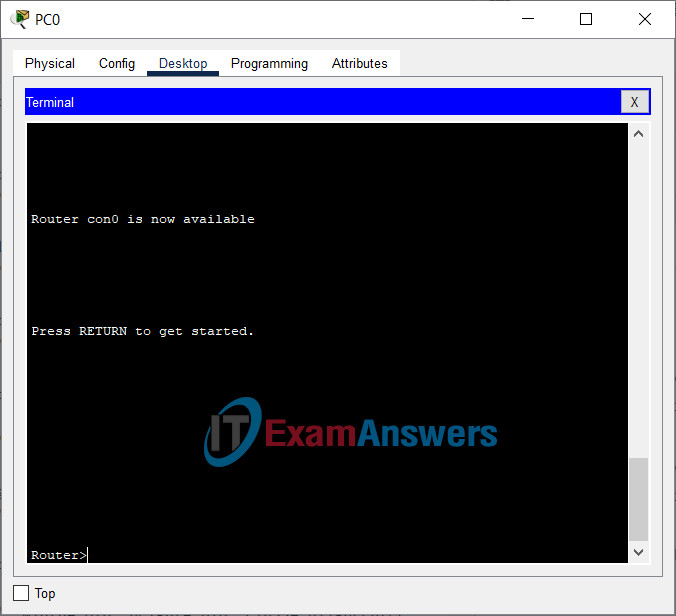
7. The screen that appears may have several messages displayed. Somewhere on the display there should be a Press RETURN to get started! message. Press ENTER.
Related article: 2.3.7 Packet Tracer – Navigate the IOS
