Packet Tracer – Propagating a Default Route in OSPFv2 (Instructor Version)
Instructor Note: Red font color or Gray highlights indicate text that appears in the instructor copy only.
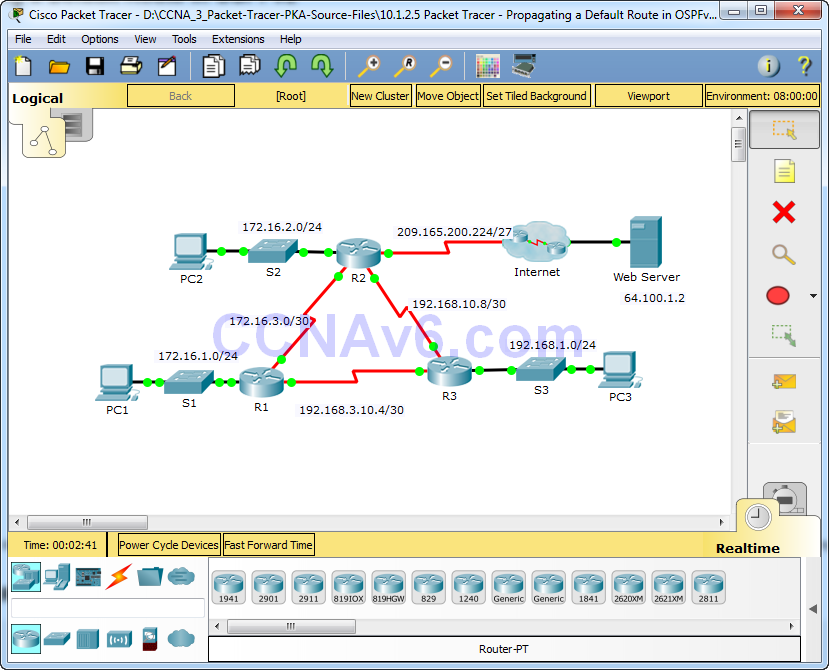
Topology

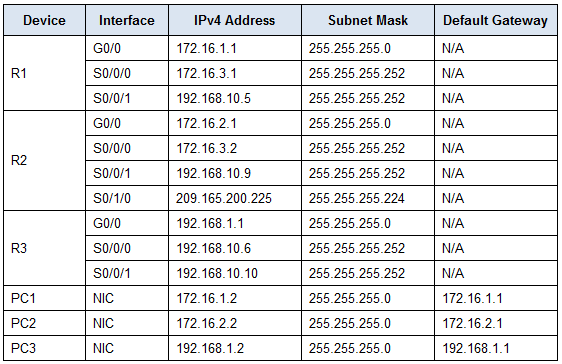
Addressing Table

Objectives
Part 1: Propagate a Default Route
Part 2: Verify Connectivity
Background
In this activity, you will configure an IPv4 default route to the Internet and propagate that default route to other OSPF routers. You will then verify the default route is in downstream routing tables and that hosts can now access a web server on the Internet.
Part 1: Propagate a Default Route
Step 1: Configure a default route on R2.
Configure R2 with a directly attached default route to the Internet.
R2(config)# ip route 0.0.0.0 0.0.0.0 Serial0/1/0
Step 2: Propagate the route in OSPF.
Configure OSPF to propagate the default route in OSPF routing updates.
R2(config-router)# default-information originate
Step 3: Examine the routing tables on R1 and R3.
Examine the routing tables of R1 and R3 to verify that the route has been propagated.
R1> show ip route
<output omitted>
O*E2 0.0.0.0/0 [110/1] via 172.16.3.2, 00:00:08, Serial0/0/0
!-------------------
R3> show ip route
<output omitted>
O*E2 0.0.0.0/0 [110/1] via 192.168.10.9, 00:08:15, Serial0/0/1
Part 2: Verify Connectivity
Verify that PC1, PC2, and PC3 can ping the web server.
