Similar to IPv4 compatible routing protocol, there are also IPv6 compatible protocols such as RIPng and EIGRPv6. If your network is based on IPv6 addressing scheme, you have to configure an IPv6 Routing protocol to perform the routing functions. In this lab exercise, we will explain how to configure RIPng routing.
RIPng is the next generation (RIPng), IPv6-compatible version of the RIP routing protocol. The basic features of RIPng remains same as supported by RIPv2 protocol. However, like other IPv6 routing protocols the configuration of RIPng is done on the interface configuration mode.
Configuring RIPng
In this exercise, we will configure the RIPng routing protocol on the IPv6 configured network. We will use the same topology that we have created and used in the previous lab exercise. Since the IPv6 configuration is already done, hence we will start from the RIPng configuration. Let’s begin. The following syntax is used to configure RIPng routing:
I. Enable IPv6 routing on router by executing ipb6 unicast-routing command.
II. Select the interface that you want to include in the RIPng process.
III. Enable RIPng protocol on the selected interface.
1. Now, load the IPv6 Topology file in Packet Tracer. On Router1, type the following commands to configure RIPng:
Router1( config)# ipv6 unicast-routing
Router1( config)# interface fa0/ 0
Router1( config-if)# ipv6 rip mark enable
Router1( config-if)# exit
Note: mark is name of RIPng process. You can use any other name as well.
2. Now, move on to Router2, type the following commands to configure RIPng:
Router2( config)# ipv6 unicast-routing
Router2( config)# interface fa0/ 0
Router2( config-if)# ipv6 rip mark enable
Router2( config)# interface fa0/ 1
Router2( config-if)# ipv6 rip mark enable
Router2( config)-if# exit
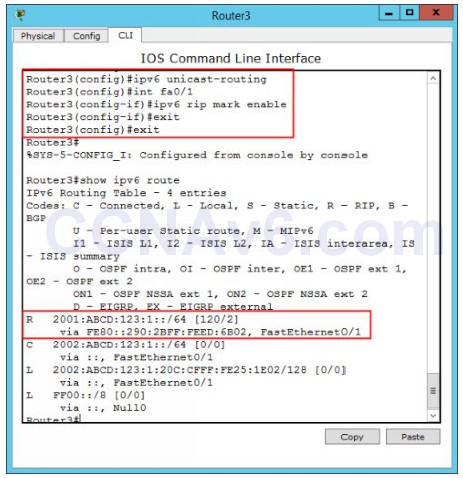
3. Now, move on to Router3 and type the following commands to configure RIPng:
Router3( config)# ipv6 unicast-routing
Router3( config)# interface fa0/ 1
Router3( config-if)# ipv6 rip mark enable
Router3( config)-if# exit
4. To view the IPv6 routing table, type the show ipv6 route command on Router3.
Router3# show ipv6 route

Verifying RIPng Configuration
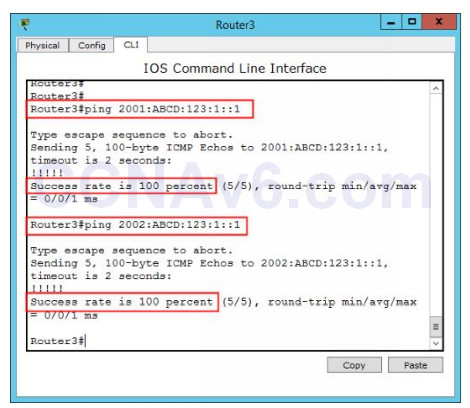
1. To test and verify the RIPng configuration, type the following commands on Router3:
Router3# ping 2001: abcd: 123: 1:: 1
Router3# ping 2002: abcd: 123: 1:: 1
Note: Now, you should be able to communicate to Router2 as well as to Router1.

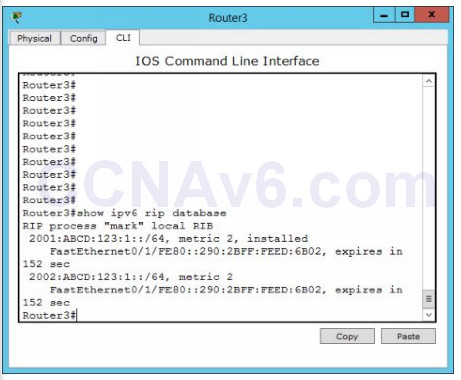
2. Optionally you can also check the RIP database by using the following command:
Router3# show ipv6 route database

3. Close the IPv6 Topology file without saving the configuration. The topology should be saved in the same state as it was after configuring IPv6 addresses. The same topology will be used to configure other OSPFv3 and EIGRPv6 routing protocols.
