Lab 2.6.1 – Topology Orientation and Building a Small Network (Answers)
Topology Diagram
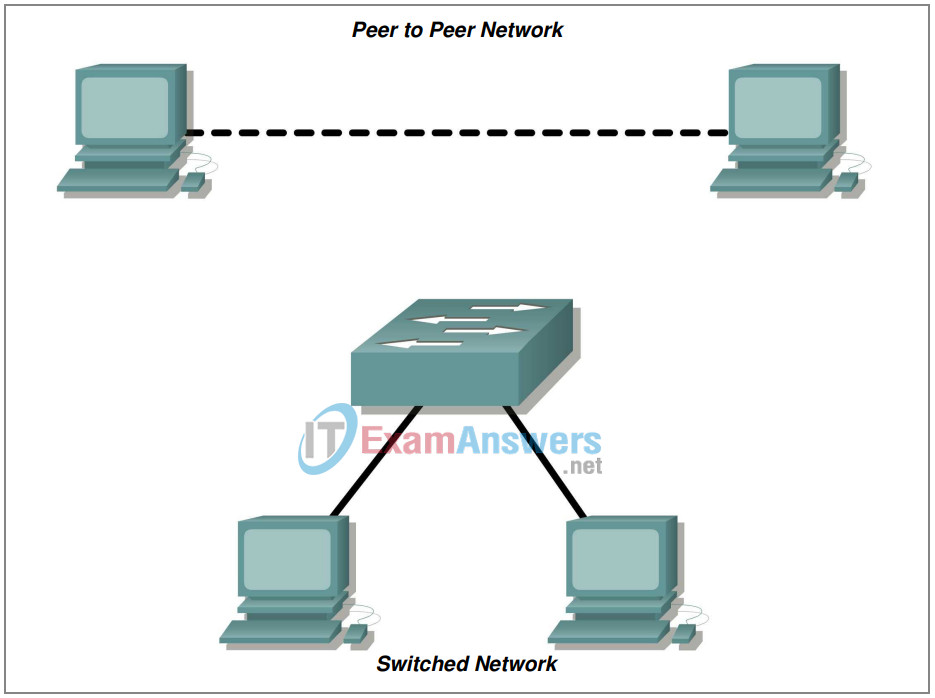
Learning Objectives
Upon completion of this lab, you will be able to:
- Correctly identify cables for use in the network.
- Physically cable a peer-to-peer and switched network.
- Verify basic connectivity on each network.
Background
Many network problems can be fixed at the Physical layer of a network. For this reason, it is important to have a clear understanding of which cables to use for your network connections.
At the Physical layer (Layer 1) of the OSI model, end devices must be connected by media (cables). The type of media required depends on the type of device being connected. In the basic portion of this lab, straight-through or patch-cables will be used to connect workstations and switches.
In addition, two or more devices communicate through an address. The Network layer (Layer 3) requires a unique address (also know as a logical address or IP Addresses), which allows the data to reach the appropriate destination device.
Addressing for this lab will be applied to the workstations and will be used to enable communication between the devices.
Scenario
This lab starts with the simplest form of networking (peer-to-peer) and ends with the lab connecting through a switch.
Task 1: Create a Peer-to-Peer Network.
Step 1: Select a lab partner.
Step 2: Obtain equipment and resources for the lab.
Equipment needed:
2 workstations
2 straight through (patch) cables
1 crossover cable
1 switch (or hub)
Task 2: Identify the Cables used in a Network.
Before the devices can be cabled, you will need to identify the types of media you will be using. The cables used in this lab are crossover and straight-through.
Use a crossover cable to connect two workstations to each other through their NIC’s Ethernet port. This is an Ethernet cable. When you look at the plug you will notice that the orange and green wires are in opposite positions on each end of the cable.
Use a straight-through cable to connect the router’s Ethernet port to a switch port or a workstation to a switch port. This is also an Ethernet cable. When you look at the plug you will notice that both ends of the cable are exactly the same in each pin position.
Task 3: Cable the Peer-to-peer Network.

Step 1: Connect two workstations.
Using the correct Ethernet cable, connect two workstations together. Connect one end of the cable to the NIC port on PC1 and the other end of the cable to PC2.
Which cable did you use?
Crossover cable
Step 2: Apply a Layer 3 address to the workstations.
To complete this task, you will need to follow the step-by-step instructions below.
Note: These steps must be completed on each workstation. The instructions are for Windows XP—steps may differ slightly if you are using a different operating system.
1. On your computer, click Start, right-click My Network Places, and then click Properties. The Network Connections window should appear, with icons showing the different network connections.
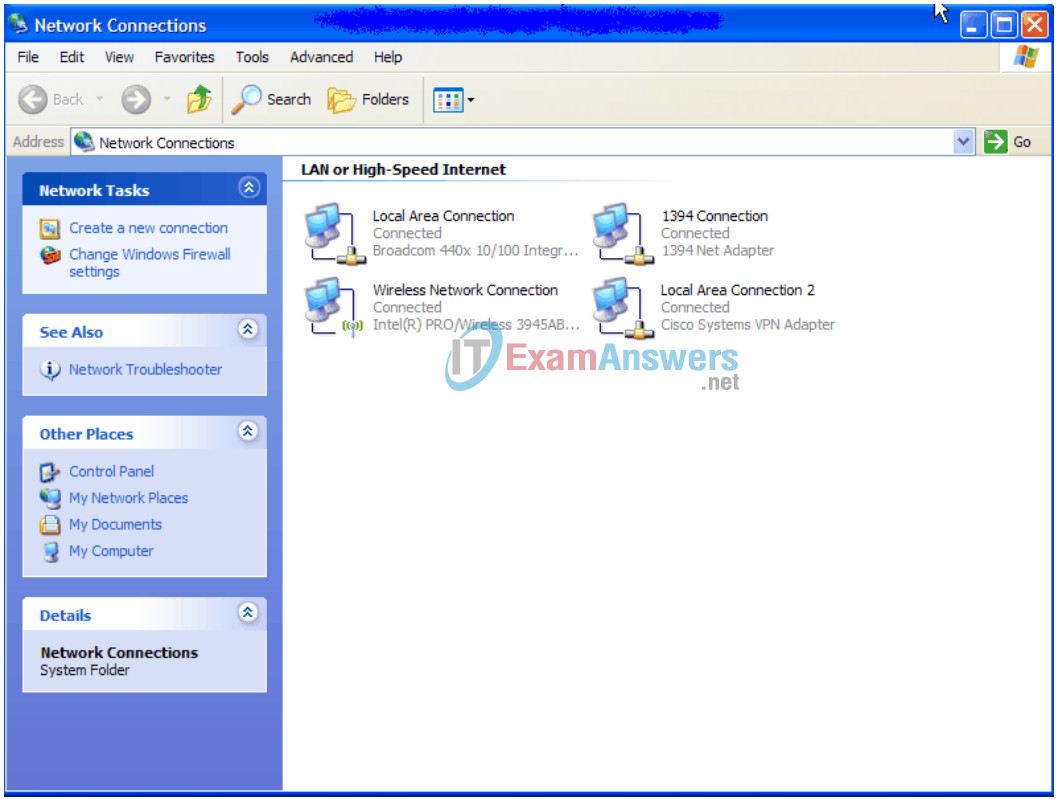
2. Right-click the Local Area Connection and click Properties.
3. Select the Internet Protocol (TCP/IP) item and then click the Properties button.
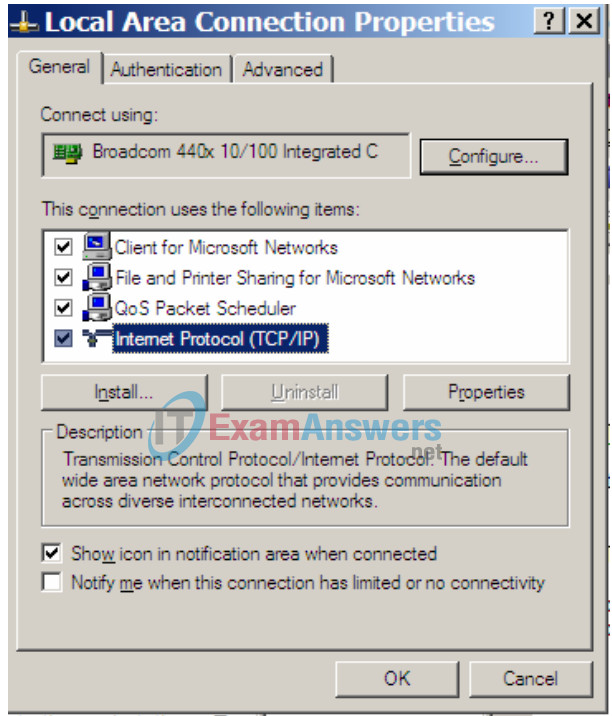
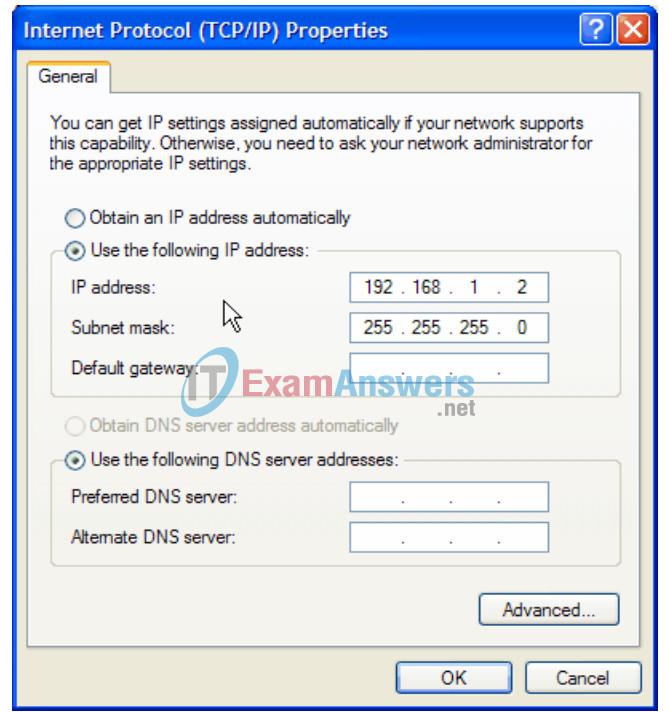
4. On the General tab of the Internet Protocol (TCP/IP) Properties window, select the Use the following IP address option.
5. In the IP address box, enter the IP address 192.168.1.2 for PC1. (Enter the IP address 192.168.1.3 for PC2.)
6. Press the tab key and the Subnet mask is automatically entered. The subnet address should be 255.255.255.0. If this address is not automatically entered, enter this address manually.
7. Click OK.
8. Close the Local Area Connection Properties window.
Step 3: Verify connectivity.
1. On your computer, click Start, and then click Run.
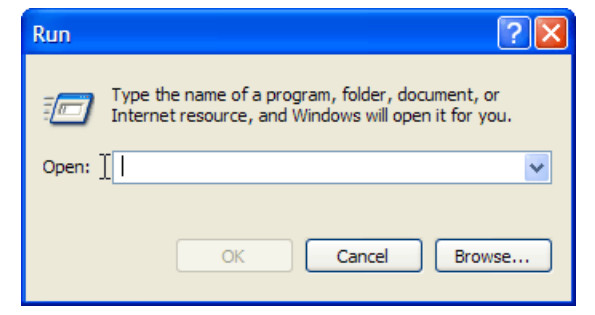
2. Type cmd in the Open box and then click OK.
The DOS command (cmd.exe) window will appear. You can enter DOS commands using this window. For the purposes of this lab, basic network commands will be entered to allow you to test you computer connections.
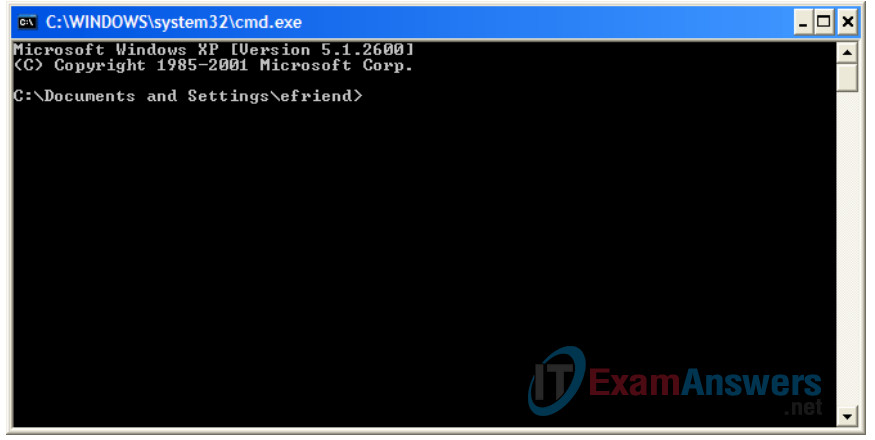
The ping command is a computer network tool used to test whether a host (workstation, router, server, etc.) is reachable across an IP network.
3. Use the ping command to verify that PC1 can reach PC2 and PC2 can reach PC1. From the PC1 DOS command prompt, type ping 192.168.1.3. From the PC2 DOS command prompt, type ping 192.168.1.2.
What is the output of the ping command?
Answer for PC1:
Reply from 192.168.1.3: bytes=32 time<1ms TTL=128
Reply from 192.168.1.3: bytes=32 time<1ms TTL=128
Reply from 192.168.1.3: bytes=32 time<1ms TTL=128
Reply from 192.168.1.3: bytes=32 time<1ms TTL=128
If the ping command displays an error message or doesn’t receive a reply from the other workstation, troubleshoot as necessary. Possible areas to troubleshoot include:
- Verifying the correct IP addresses on both workstations
- Ensuring that the correct type of cable is used between the workstations
What is the output of the ping command if you unplug the network cable and ping the other workstation?
Answer for PC1:
Destination host unreachable.
Destination host unreachable.
Destination host unreachable.
Destination host unreachable.
Task 4: Connect Your Workstations to the Classroom Lab Switch.
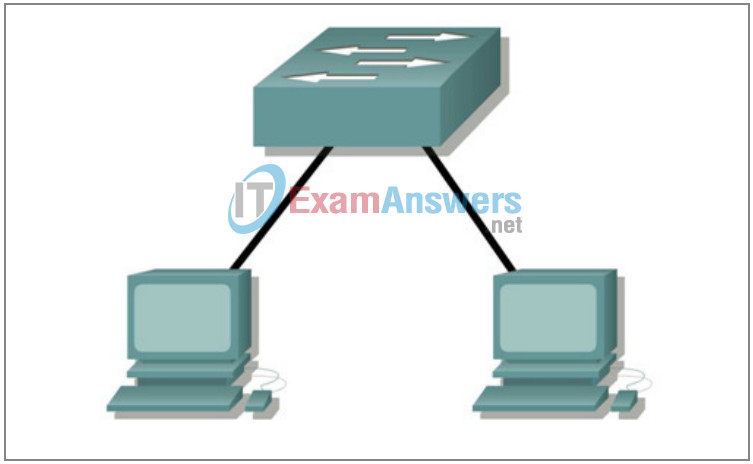
Step 1: Connect workstation to switch.
Using the correct cable, connect one end of the cable to the NIC port on the workstation and the other end to a port on the switch.
Step 2: Repeat this process for each workstation on your network.
Which cable did you use?
Straight-through cable
Step 3: Verify connectivity.
Verify network connectivity by using the ping command to reach the other workstations attached to the switch.
What is the output of the ping command?
Answer for PC1:
Reply from 192.168.1.3: bytes=32 time<1ms TTL=128
Reply from 192.168.1.3: bytes=32 time<1ms TTL=128
Reply from 192.168.1.3: bytes=32 time<1ms TTL=128
Reply from 192.168.1.3: bytes=32 time<1ms TTL=128
What is the output of the ping command if you ping an address that is not connected to this network?
Answer for PC1:
Request timed out.
Request timed out.
Request timed out.
Request timed out.
Step 4: Share a document between PCs.
1. On your desktop, create a new folder and name it test.
2. Right-click the folder and click File sharing. Note: A hand will be placed under the icon.
3. Place a file in the folder.
4. On the desktop, double-click My Network Places and then Computers Near Me.
5. Double-click the workstation icon. The test folder should appear. You will be able to access this folder across the network. Once you are able to see it and work with the file, you have access through all 7 layers of the OSI model.
Task 5: Reflection
What could prevent a ping from being sent between the workstations when they are directly connected?
Wrong IP address on workstation, pinging wrong IP address, and media disconnected
What could prevent the ping from being sent to the workstations when they are connected through the switch?
Wrong IP address, media disconnected, or a mis-configuration of the switch, switched powered off.
